Roti Bean Enchiladas

Roti Bean Enchiladas

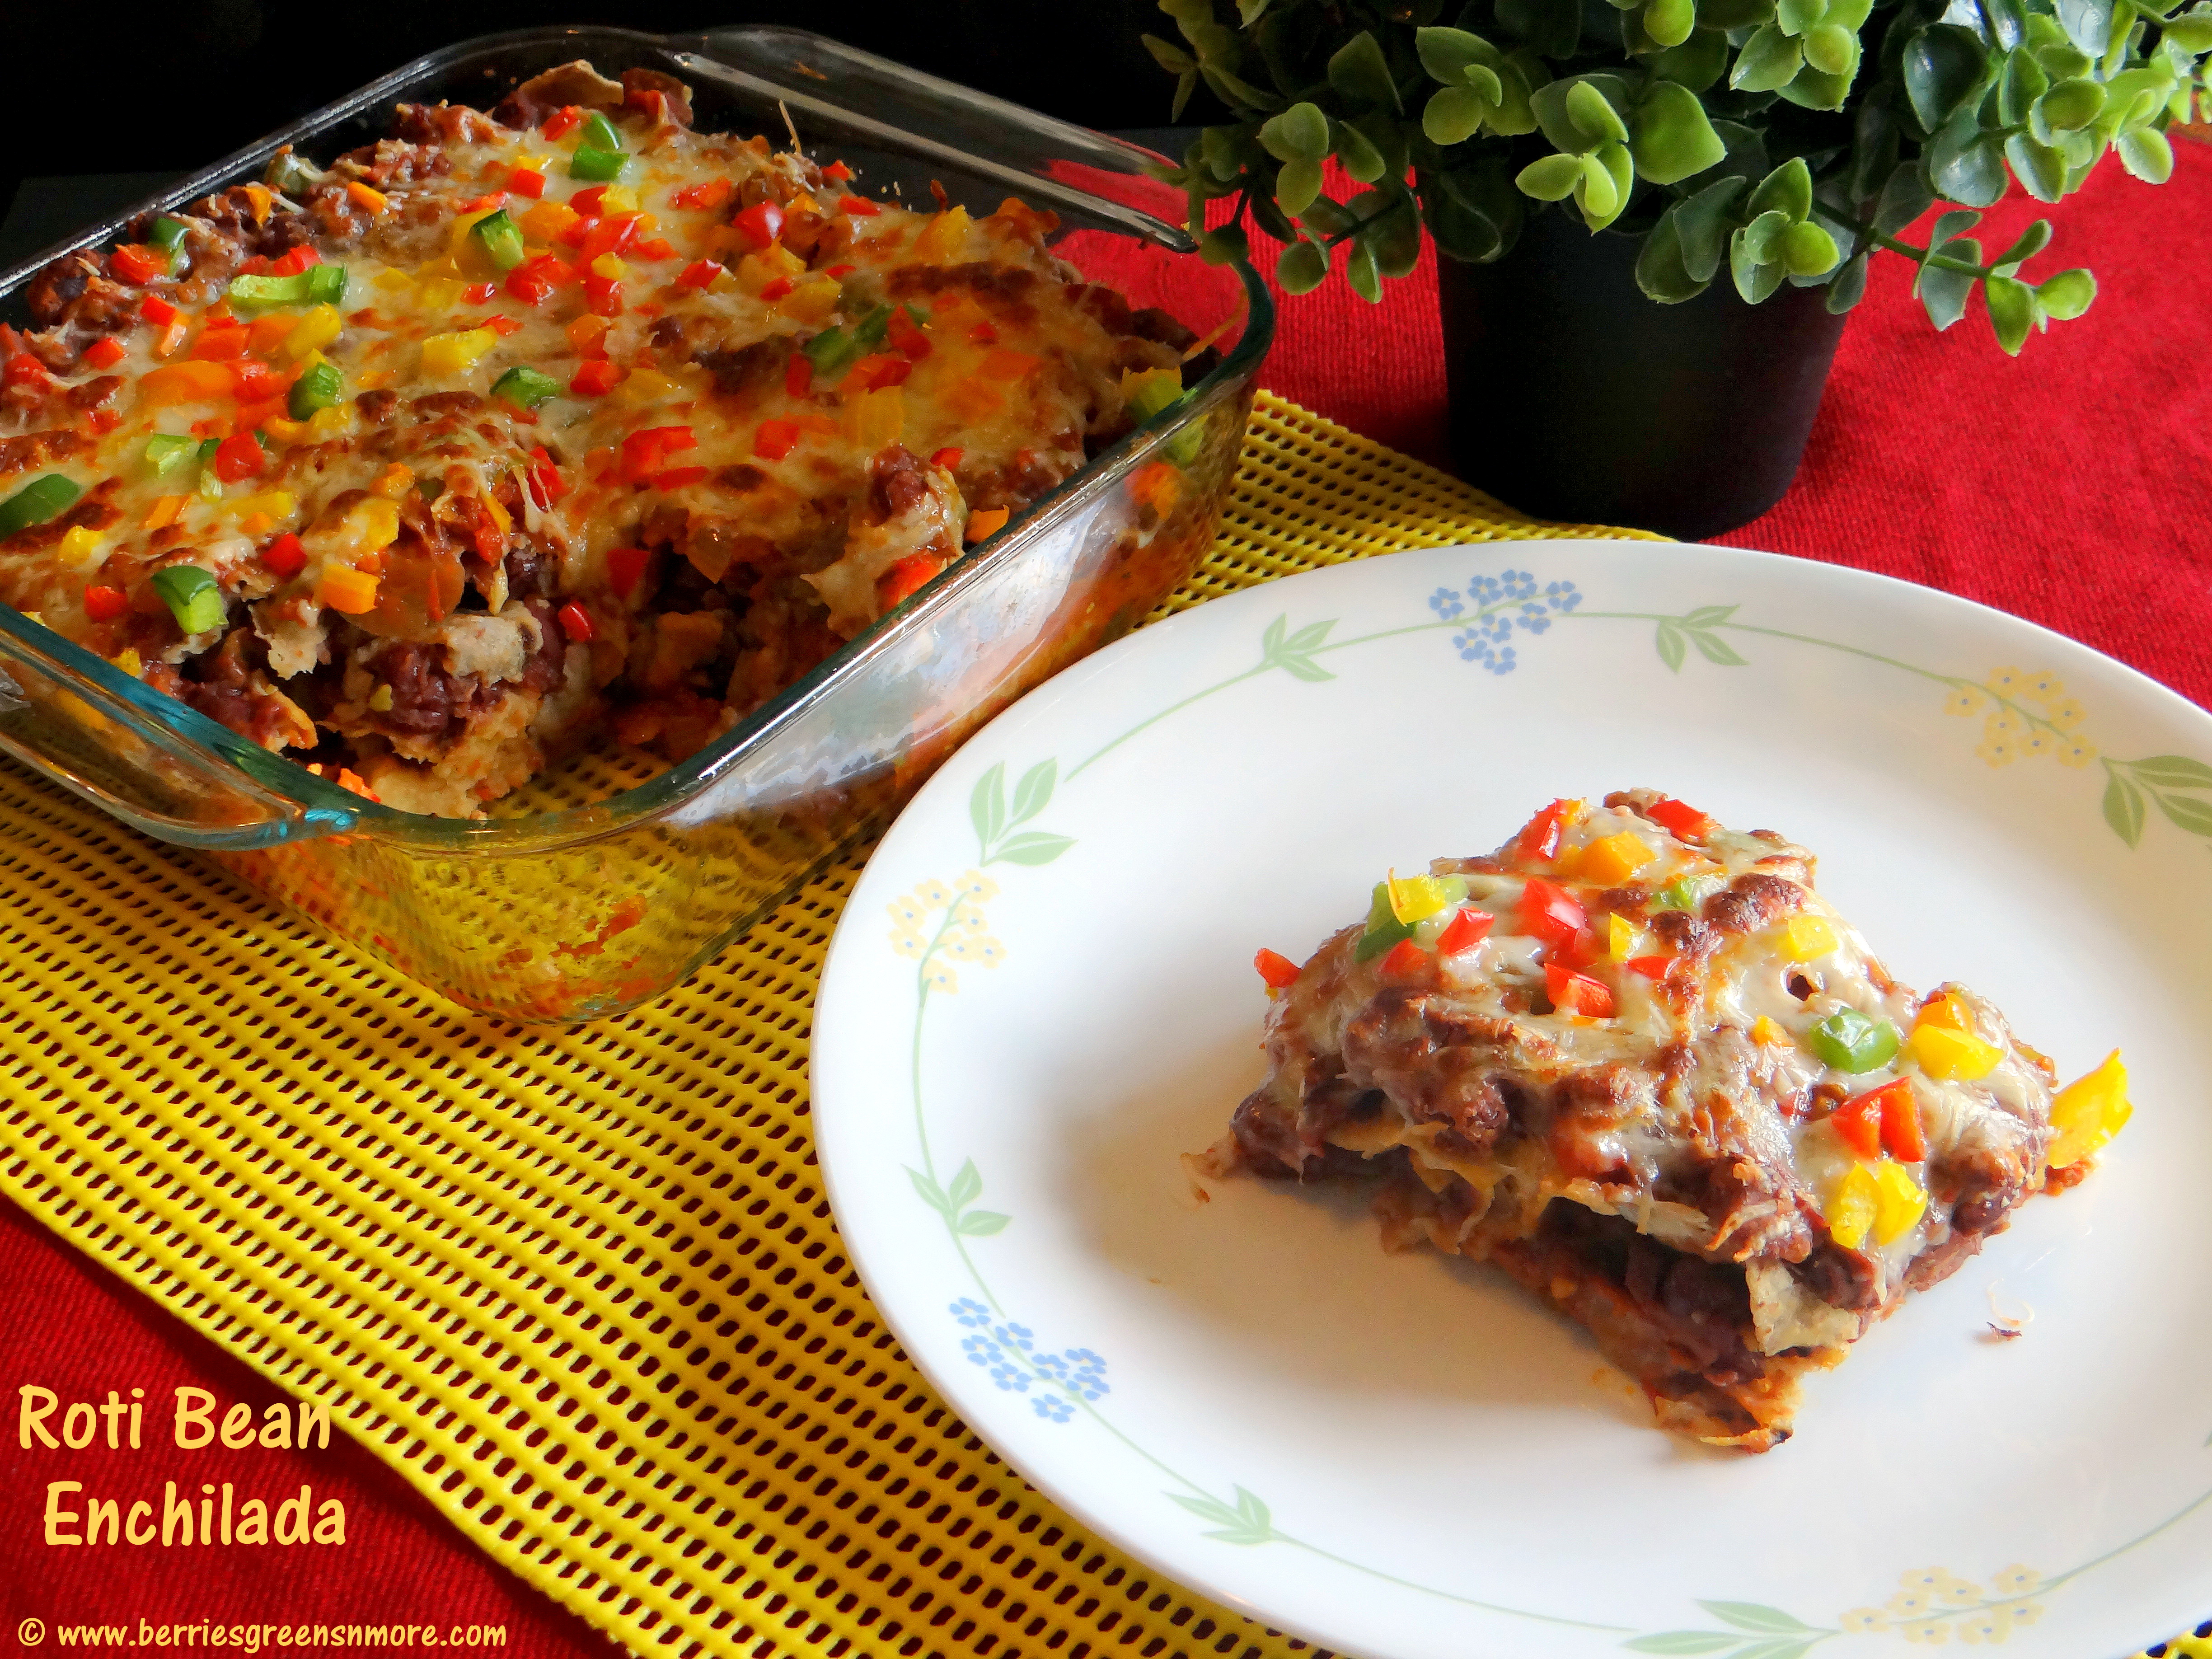
Enchiladas are one of our family favorites. Traditional enchiladas are made with corn tortillas, mexican salsa sauce, refried beans and cheese. I do love the ethnic flavors in this Mexican classic but this time I wanted to try something different and make it with an Indian twist. This is my version of Roti Bean Enchiladas made with Rajma Masala (red kidney beans cooked with Indian spices) and homemade Rotis (Indian flat bread). This “Mexi-Indian” fusion dish is very flavorful and very very delicious!! I hope this recipe will start the trend of fusion cooking from the best of the two of the oldest cultures of the world. So, let’s start cooking !!

Roti Bean Enchiladas

Roti Bean Enchiladas

Ingredients: Serves 2 to 3
1-1/2 cups red kidney beans (rajma)
(soaked for 8 hours and cooked until soft)
2 cups fresh tomato puree
½ cup chopped onions
1 cup chopped color bell peppers (capsicums)
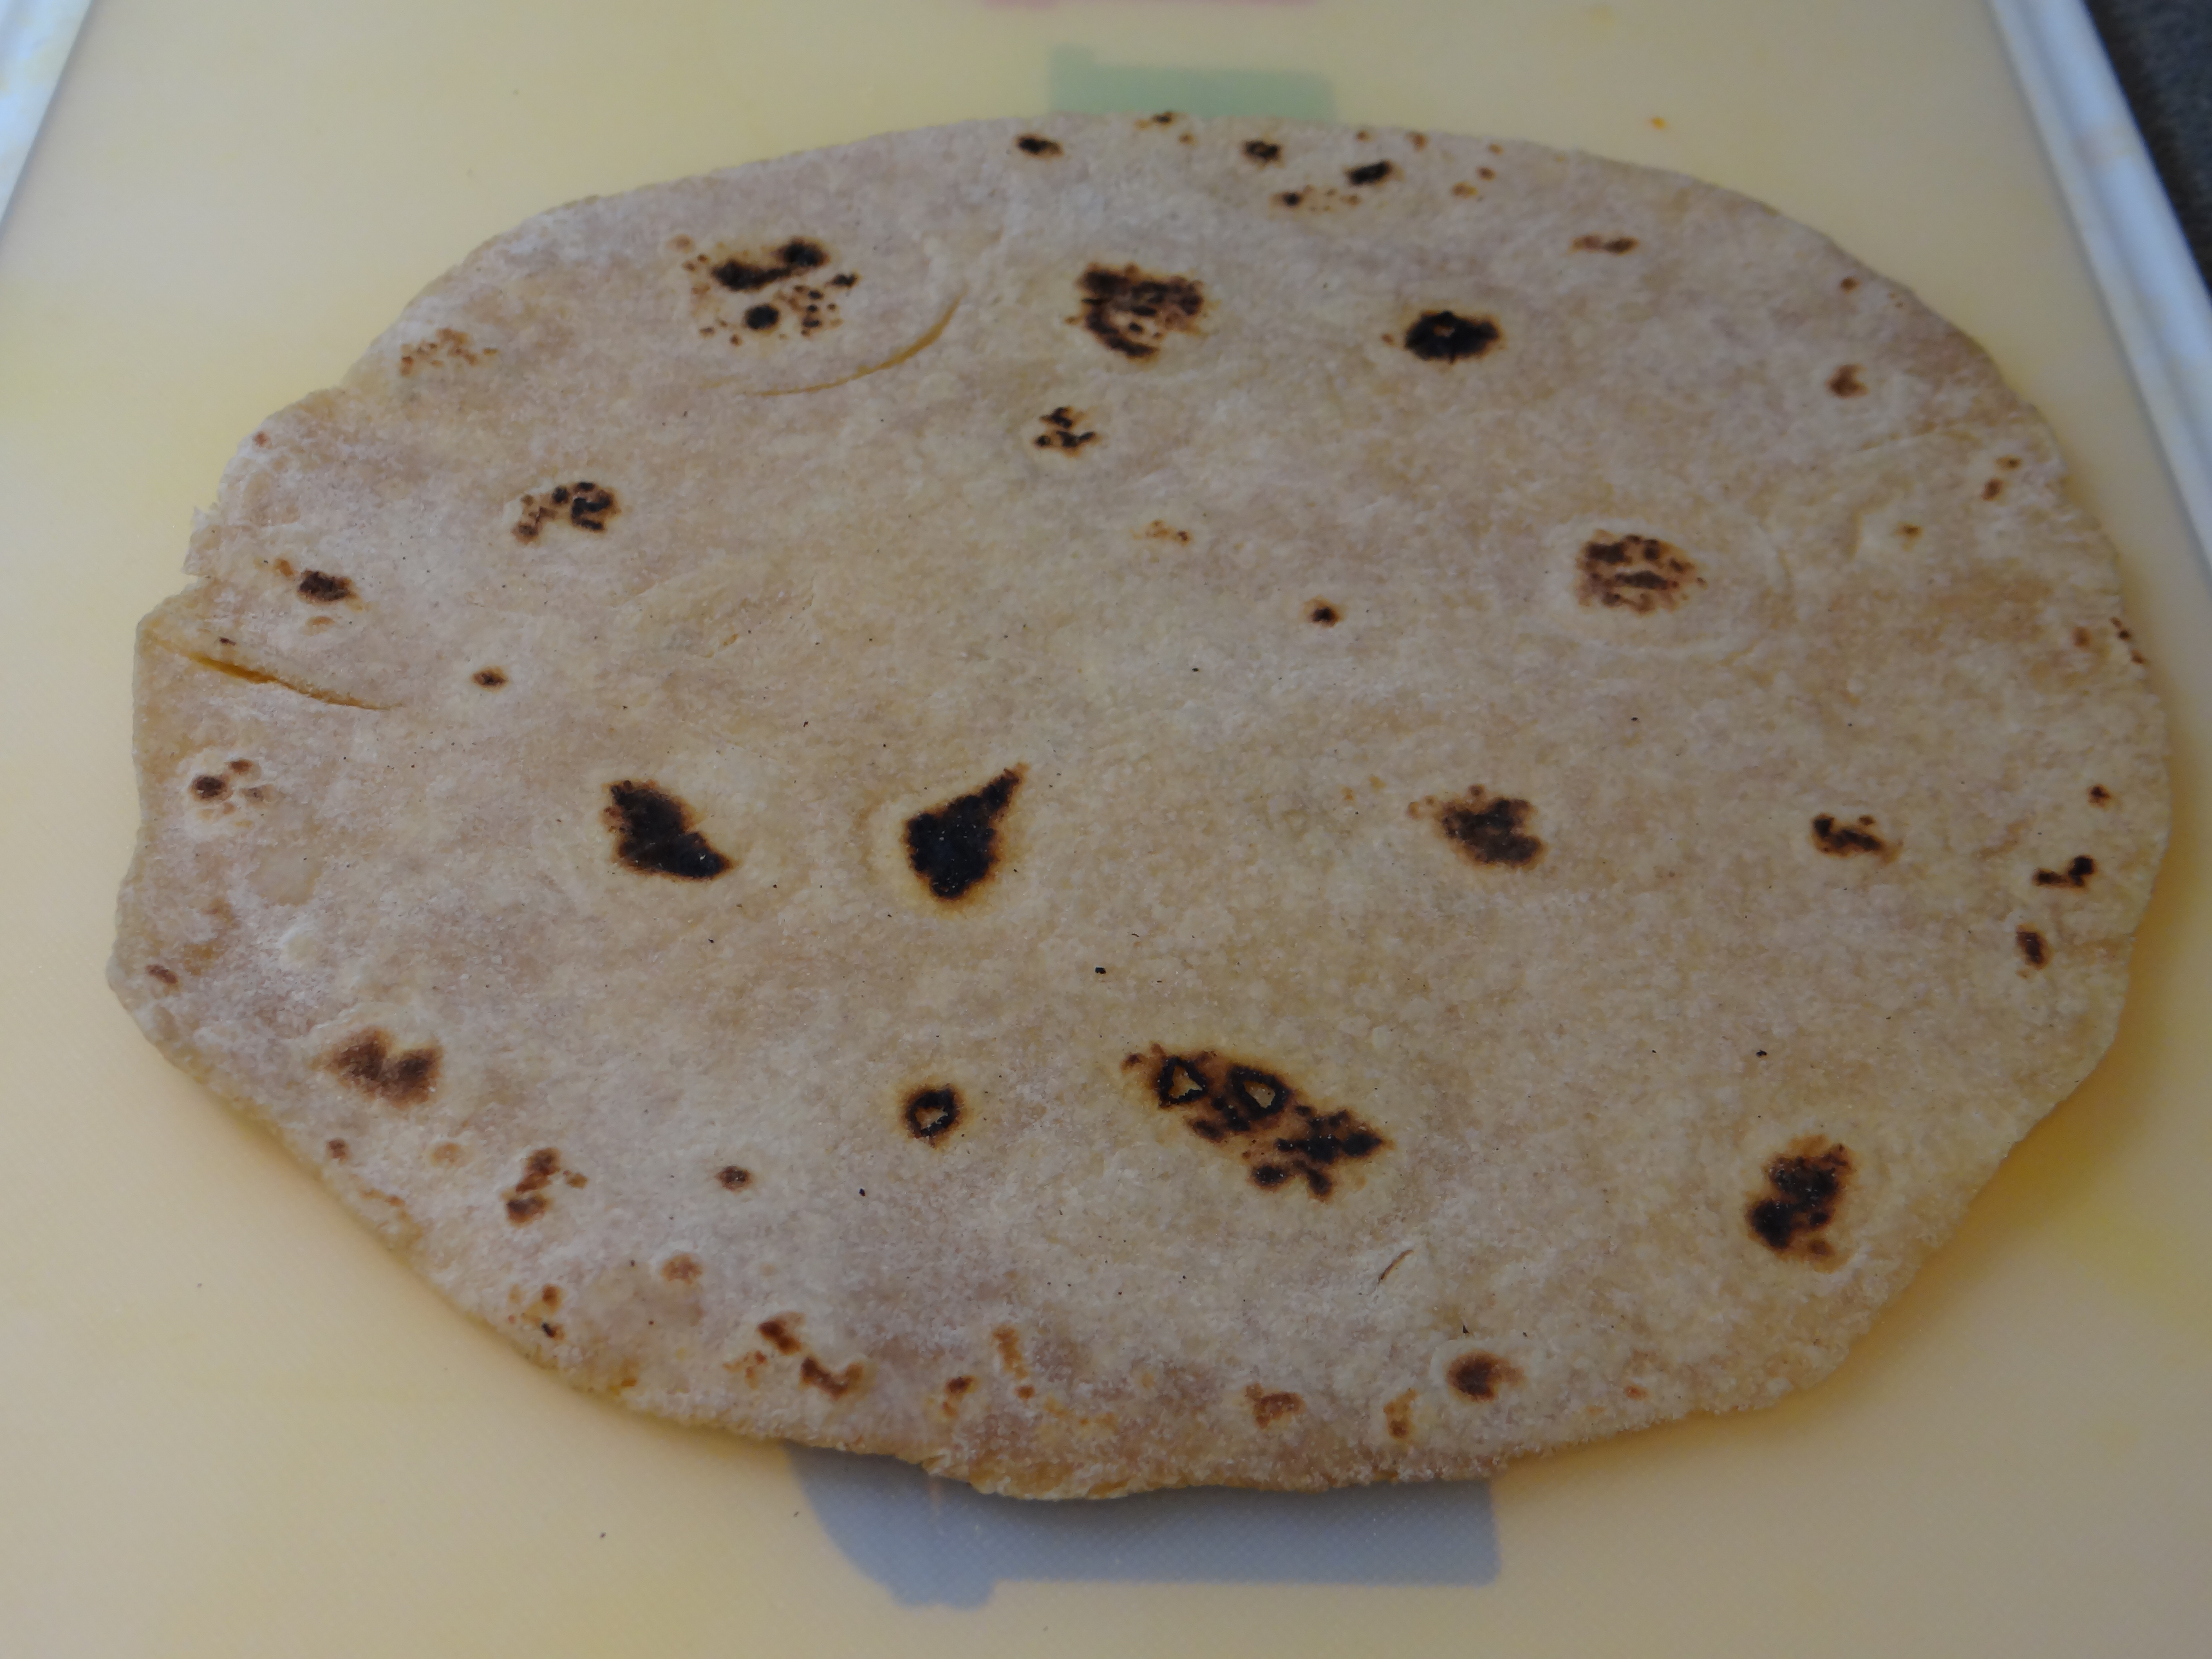
4 fresh or left over Rotis (Indian flat bread)
1 teaspoon minced garlic
1 tablespoon rajma masala or channa masala
½ teaspoon garam masala
¼ teaspoon turmeric powder
Red chilli powder as per taste
Sat as per taste
½ cup grated low fat mozzarella cheese
2 teaspoon olive oil
Method:

Roti Bean Enchiladas

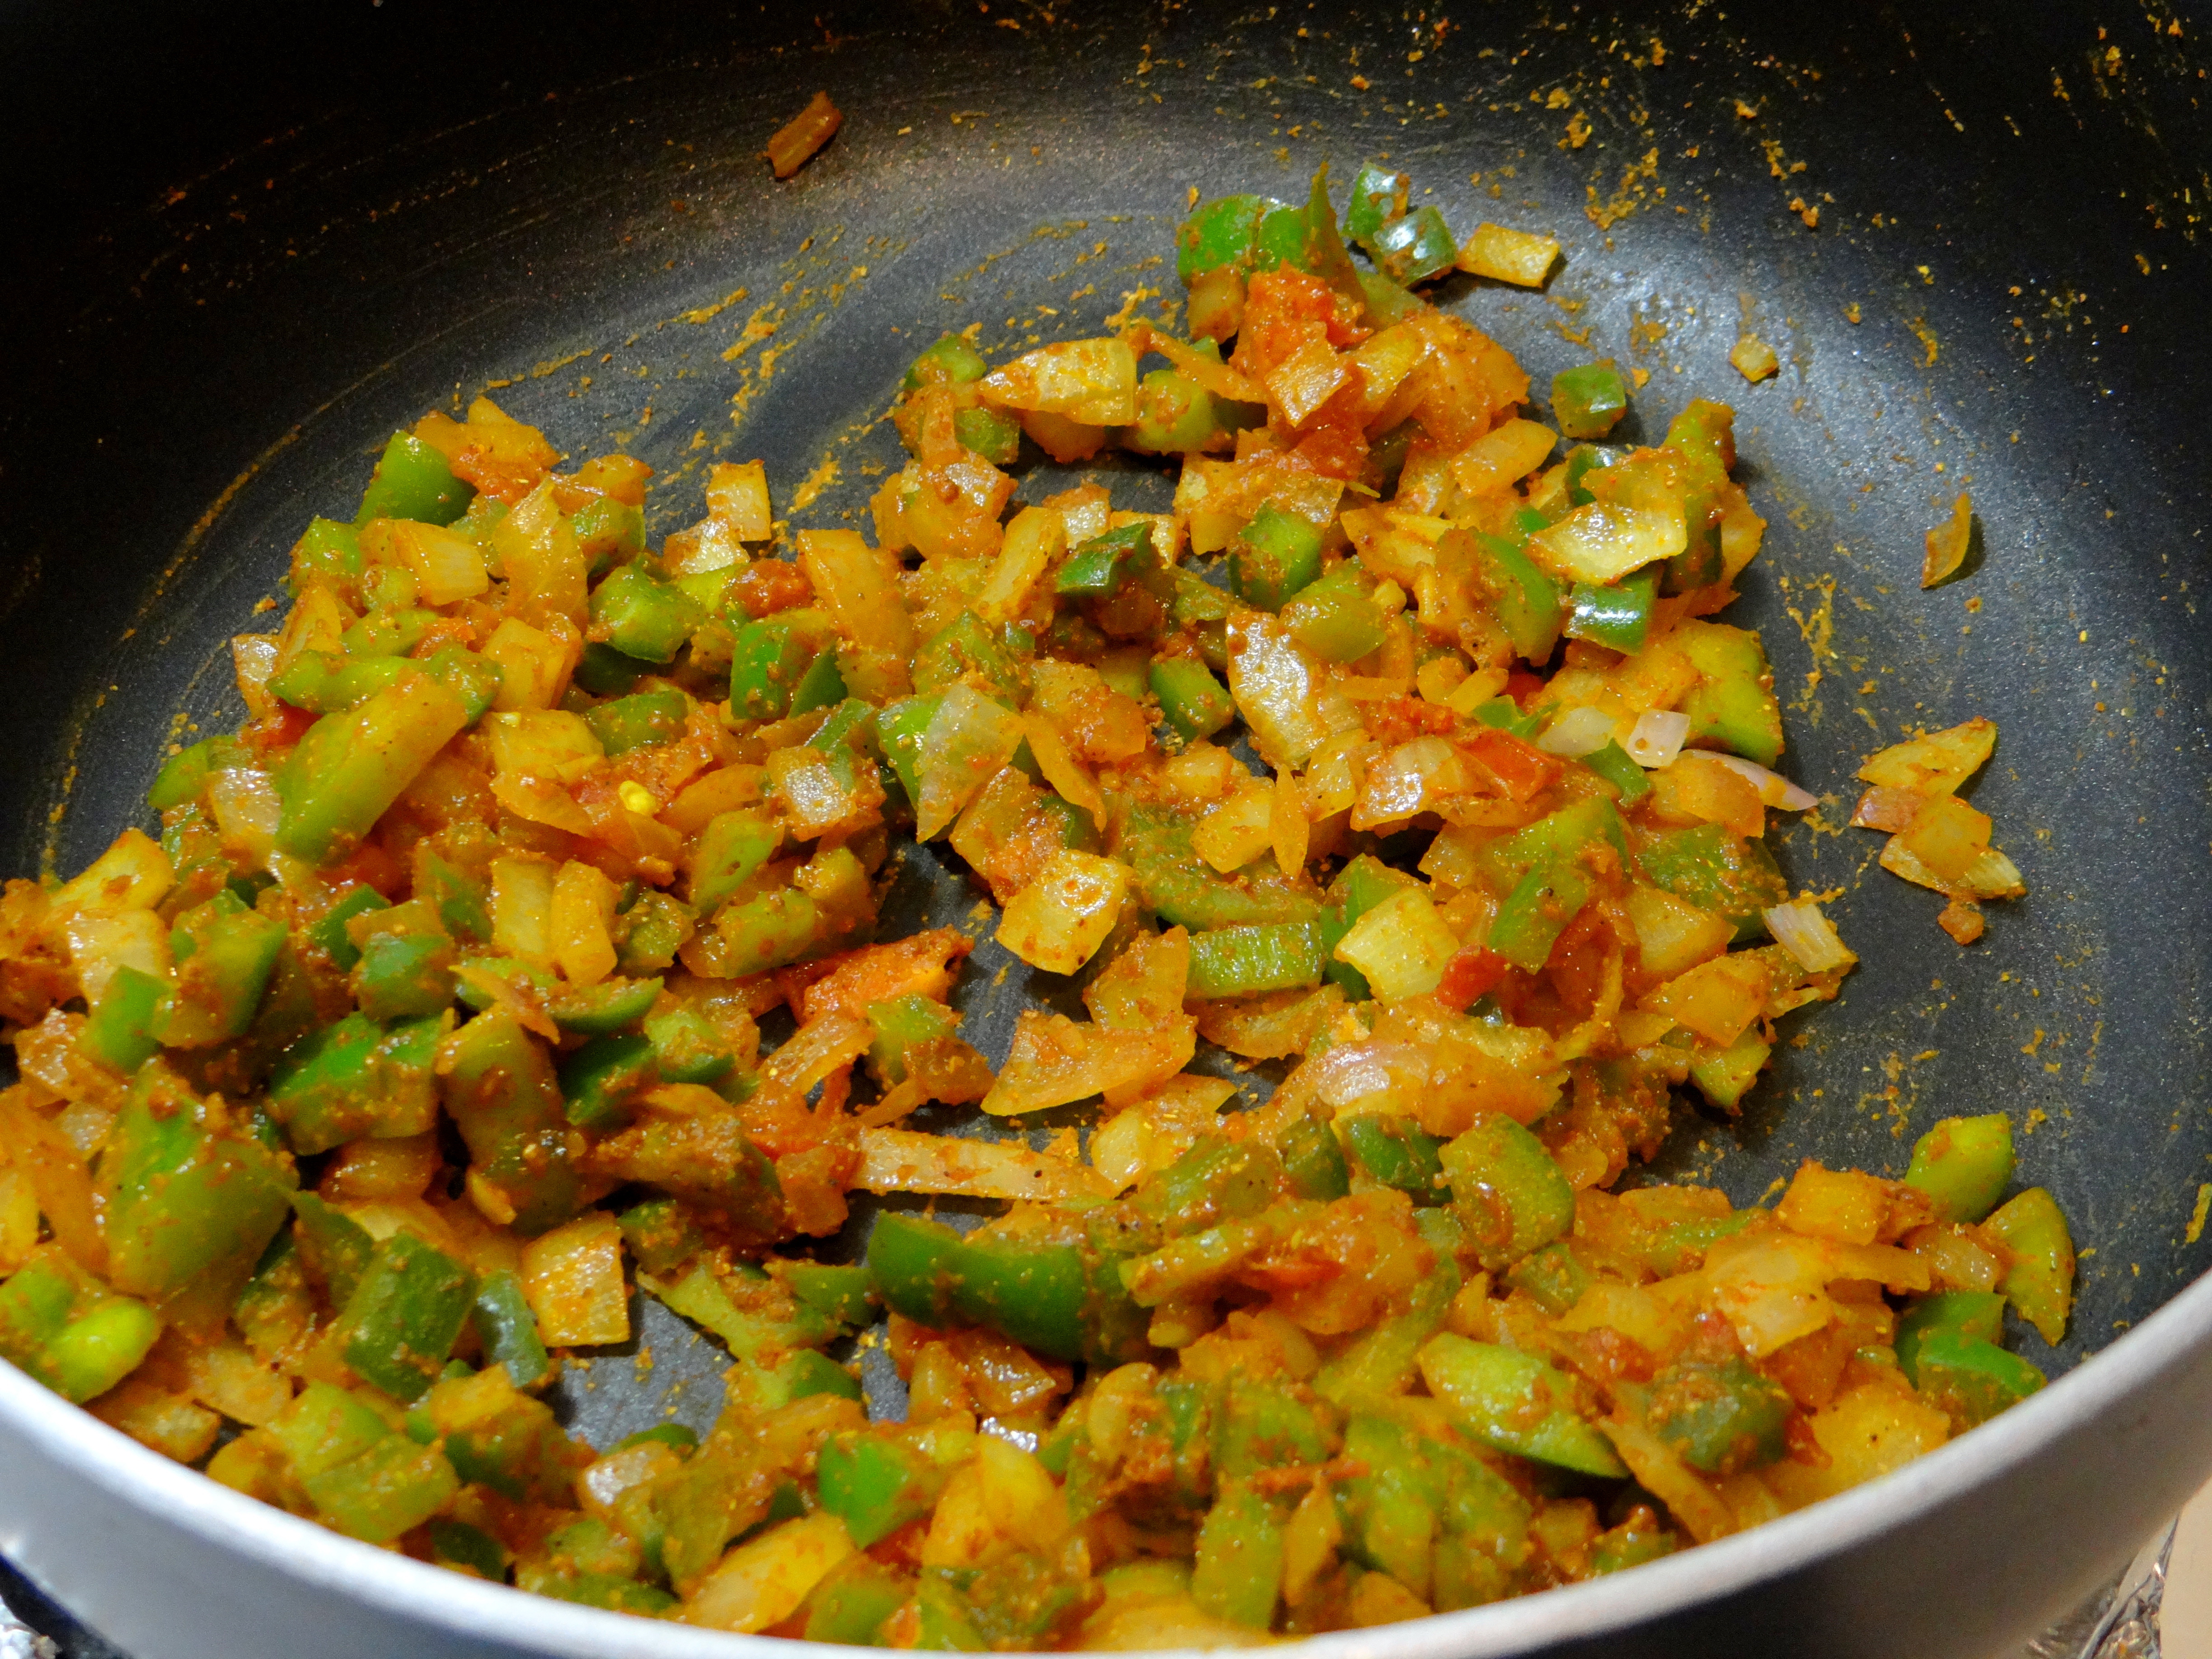
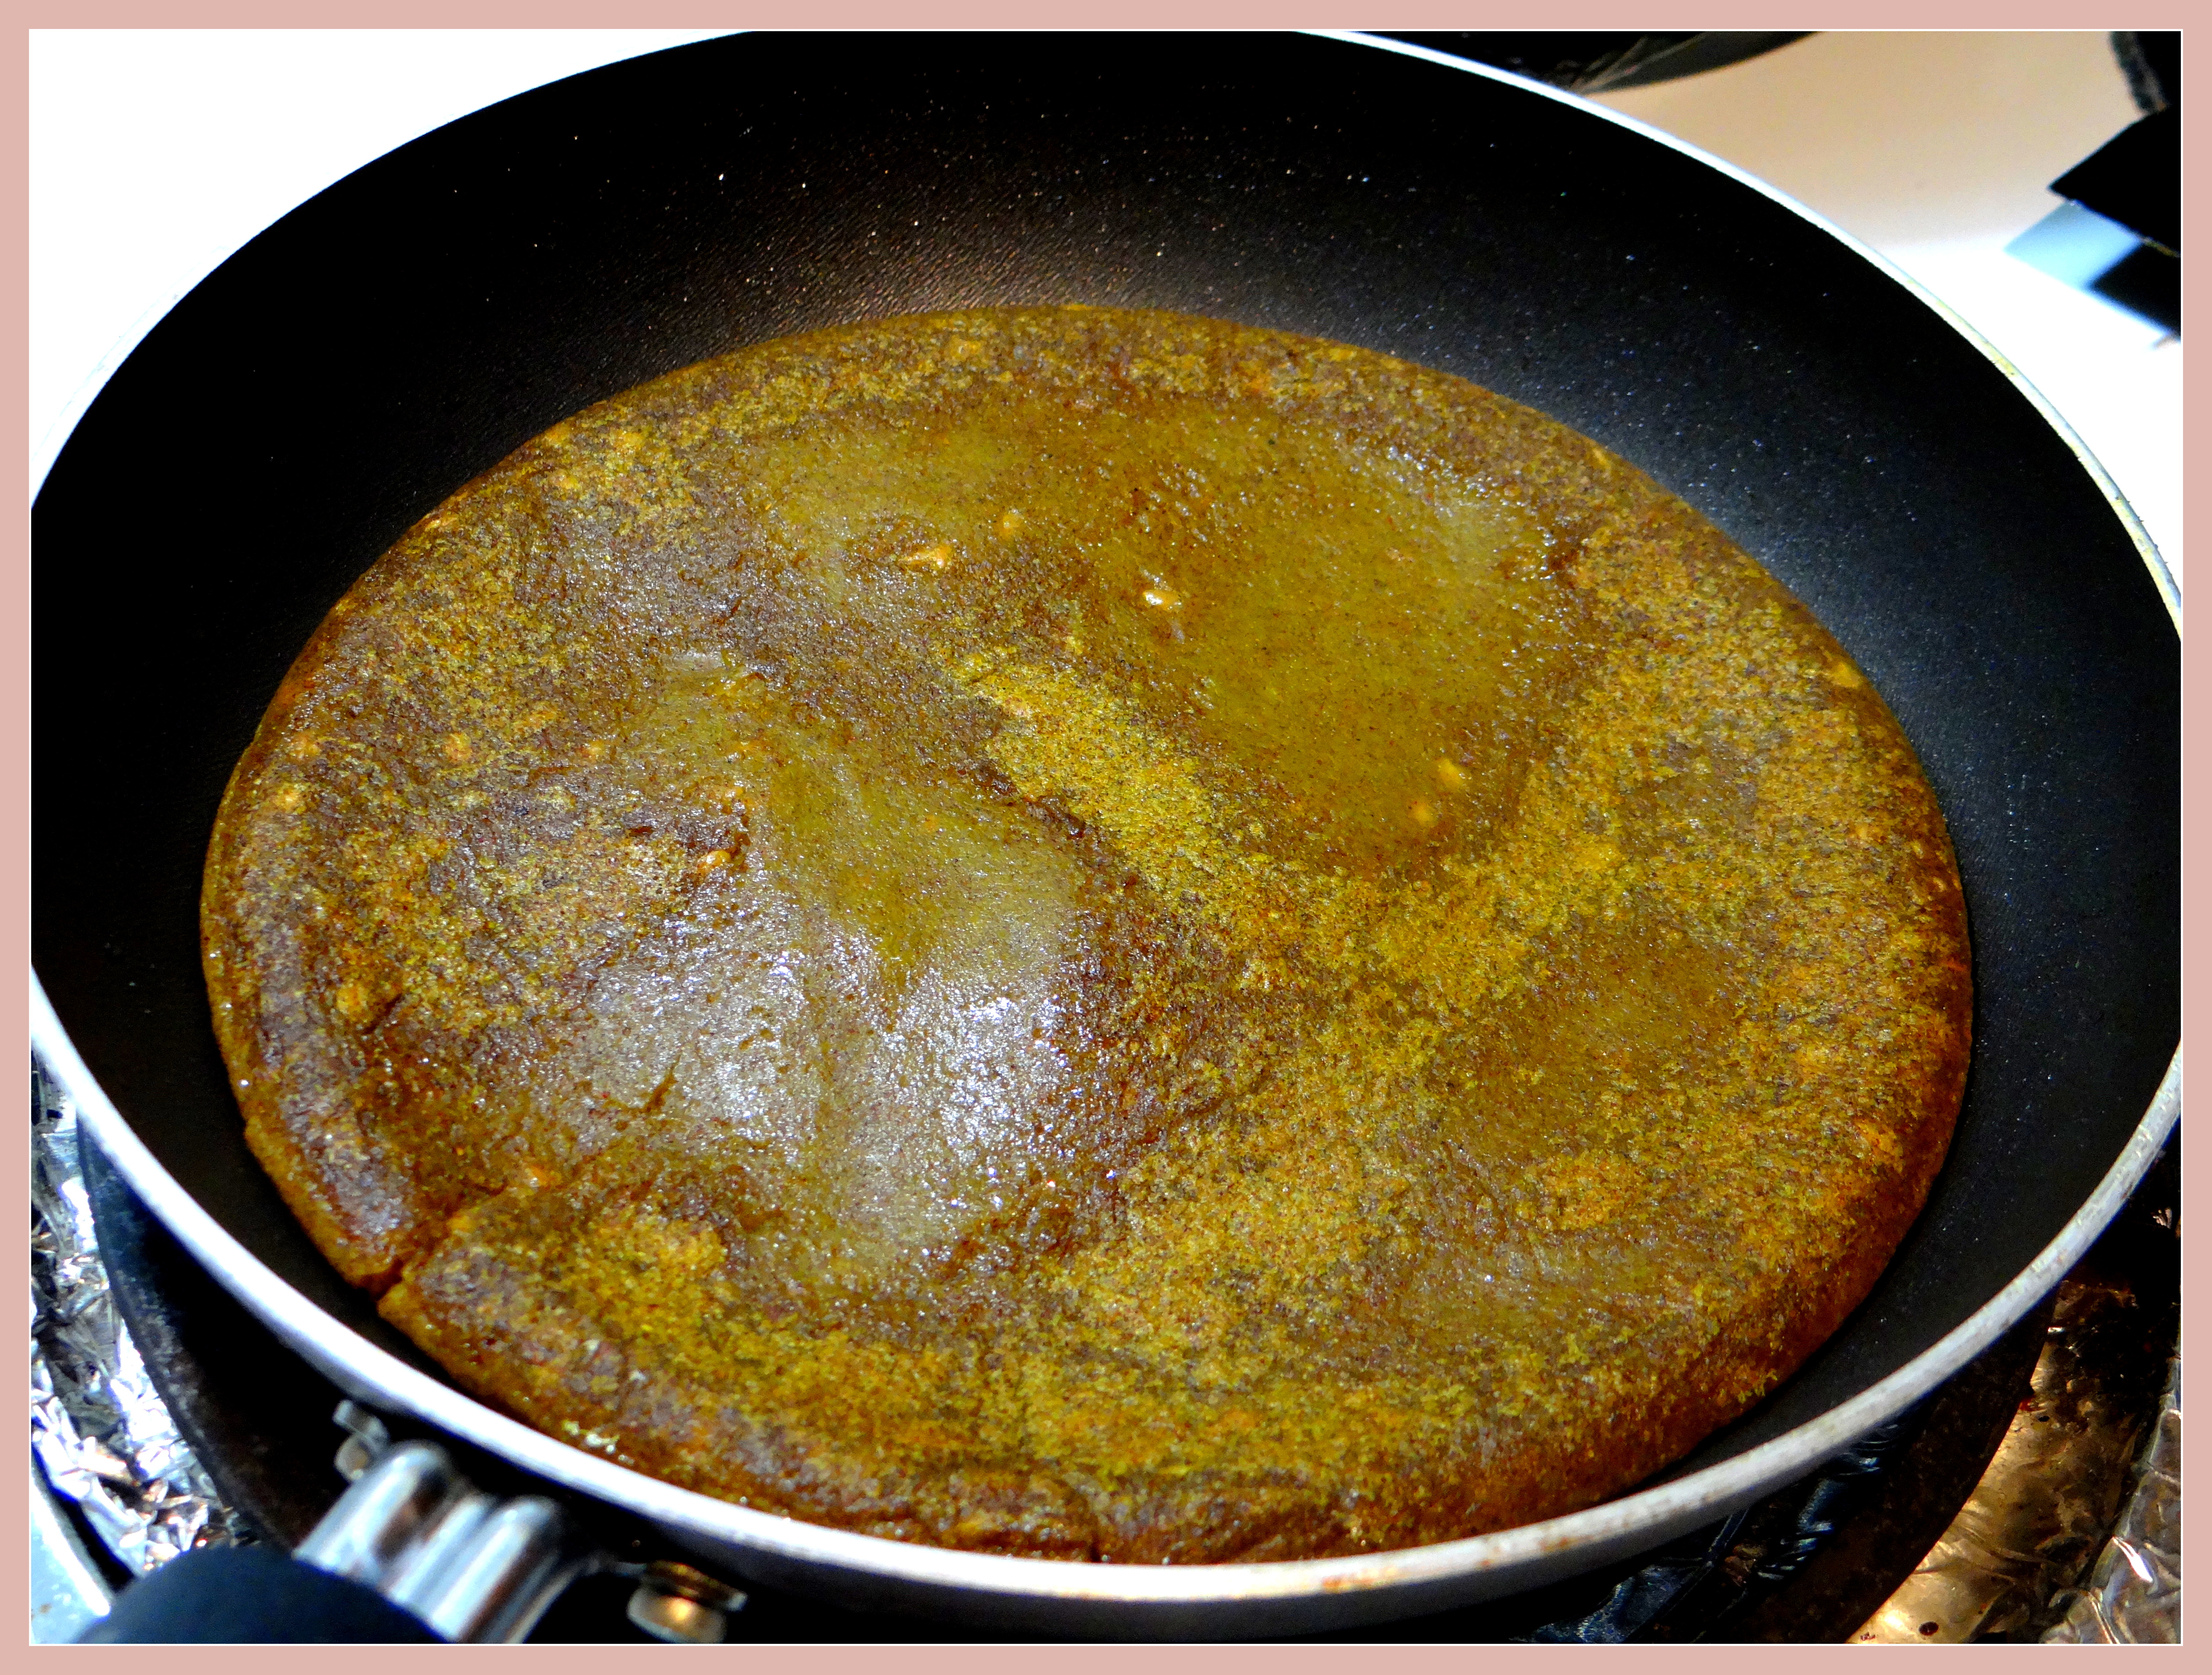
1. In a deep bottom pan, add the olive oil and when hot add the minced garlic, onions, ½ cup chopped bell peppers and stir fry for 2 to 3 minutes.

Roti Bean Enchiladas

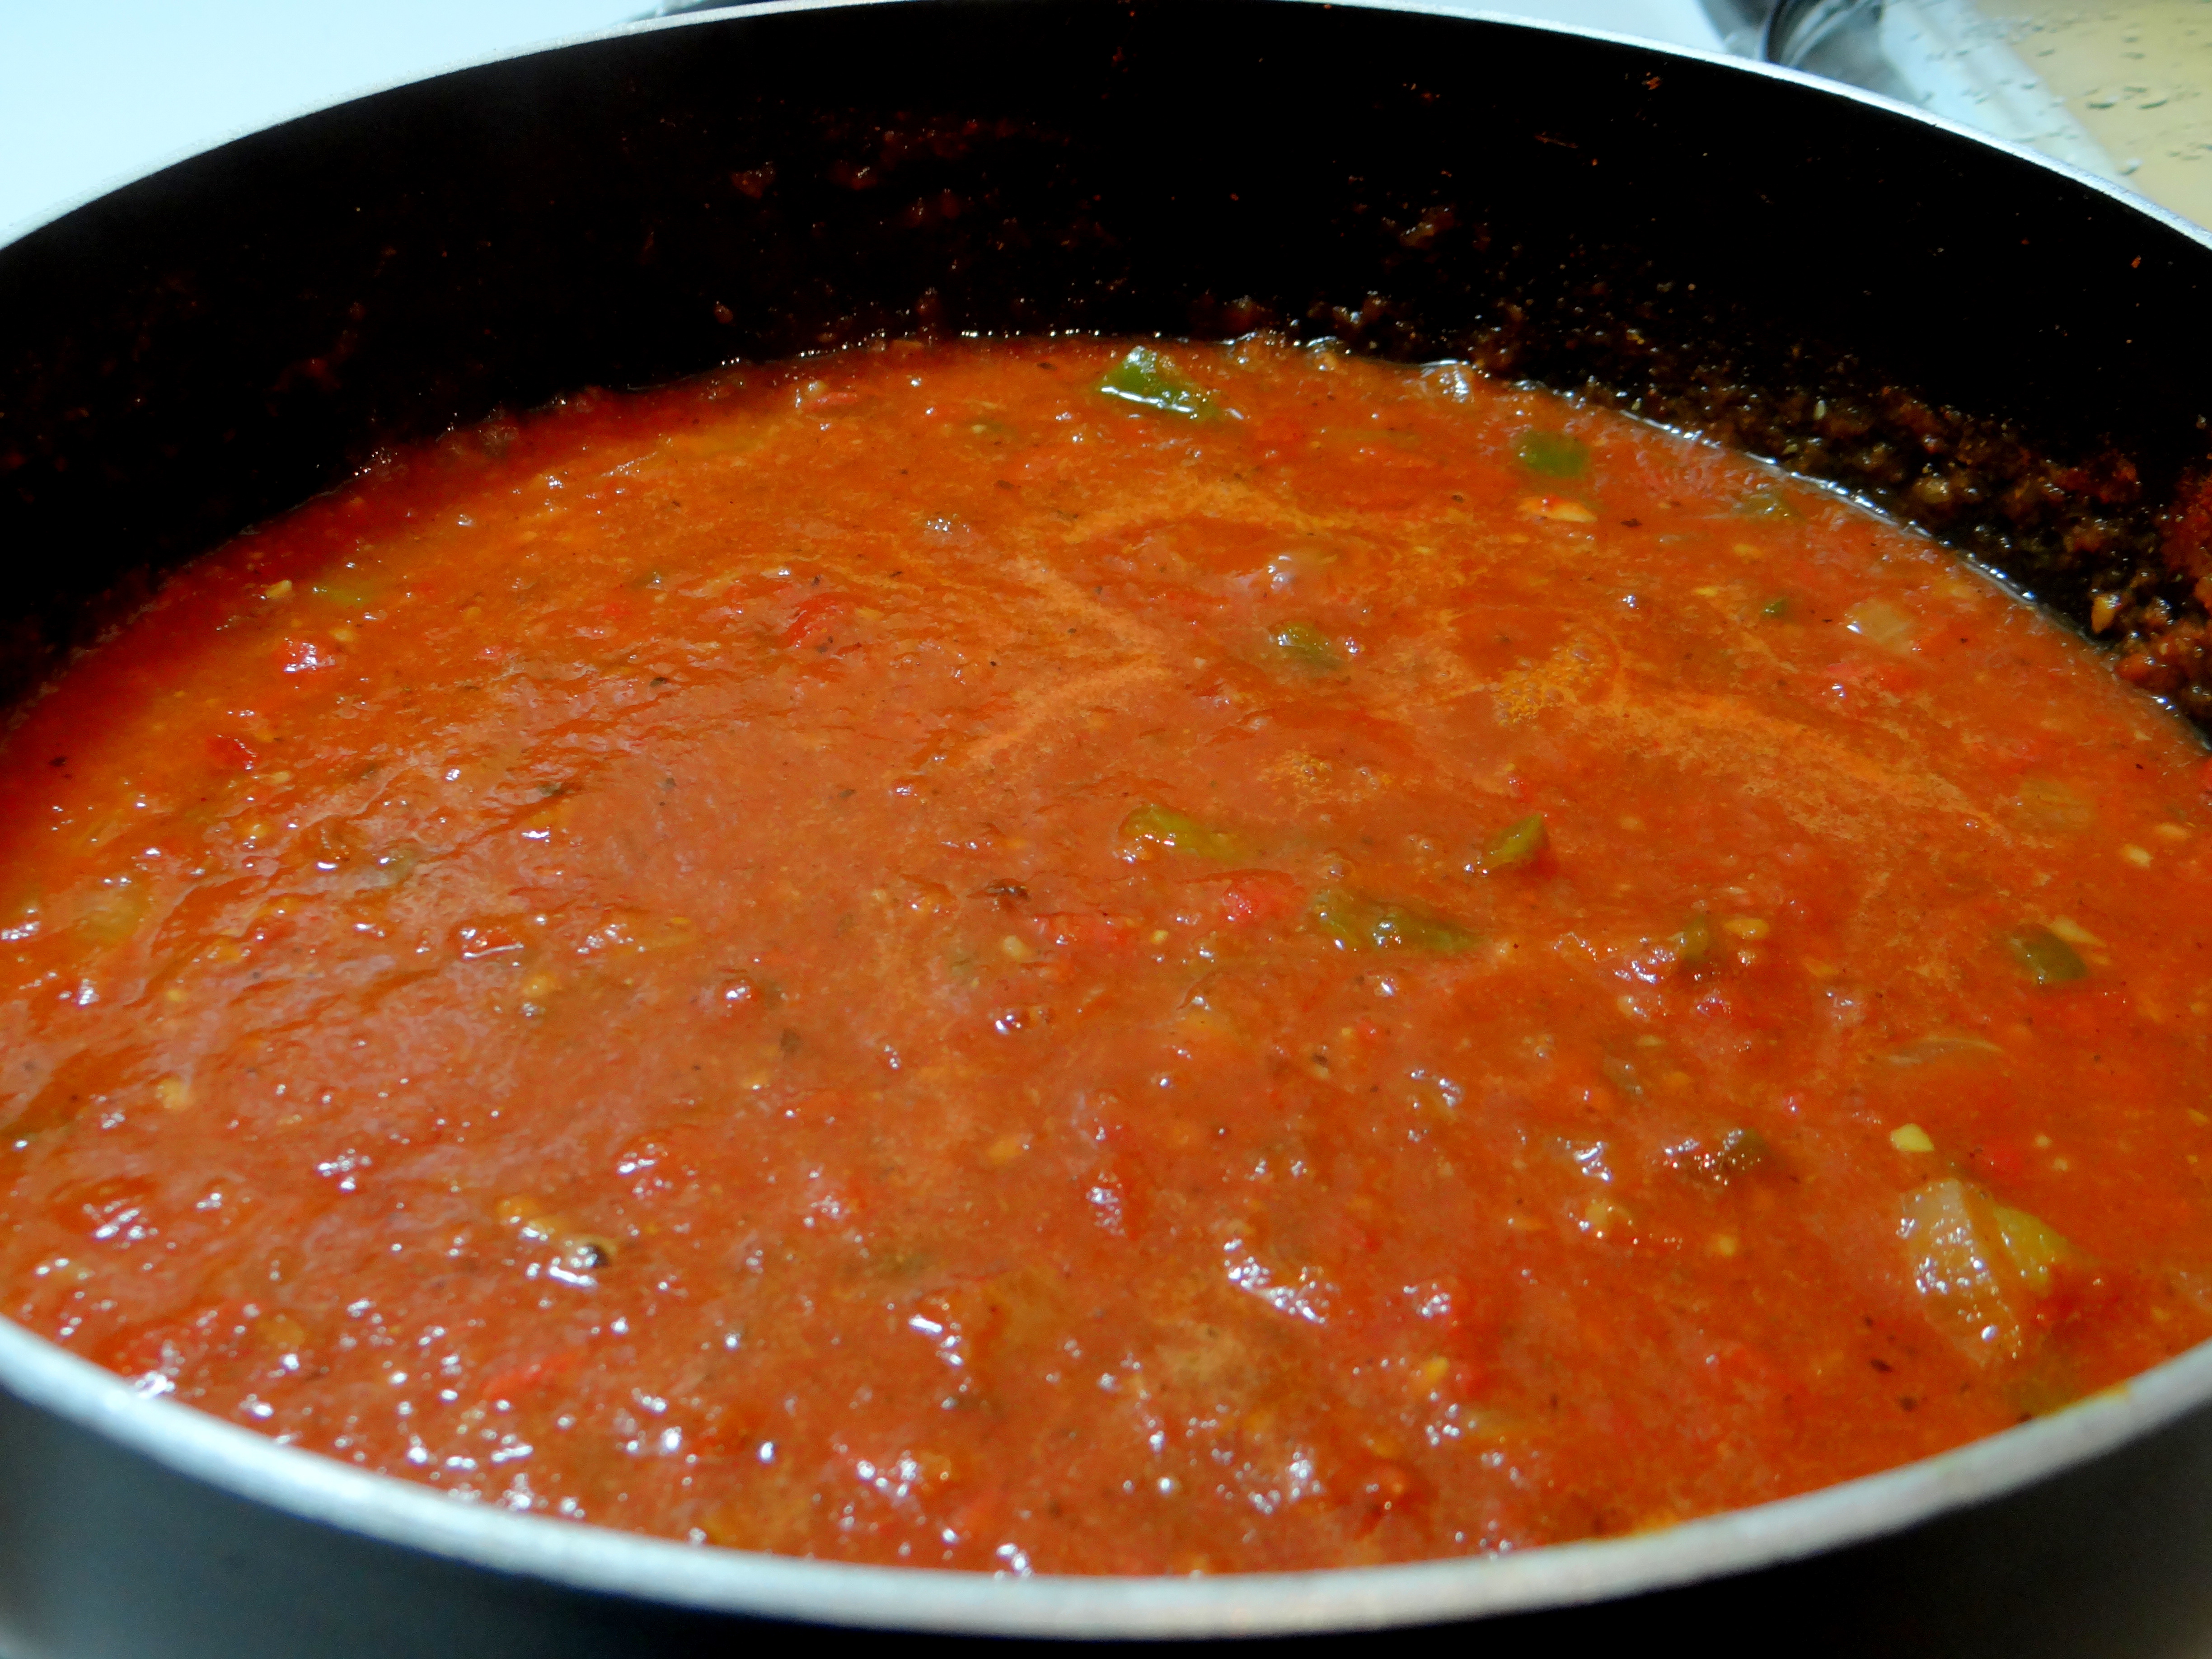
2. Now, add the tomato puree and the dry masala powder and cook for 5 minutes.

Roti Bean Enchiladas  Roti Bean Enchiladas

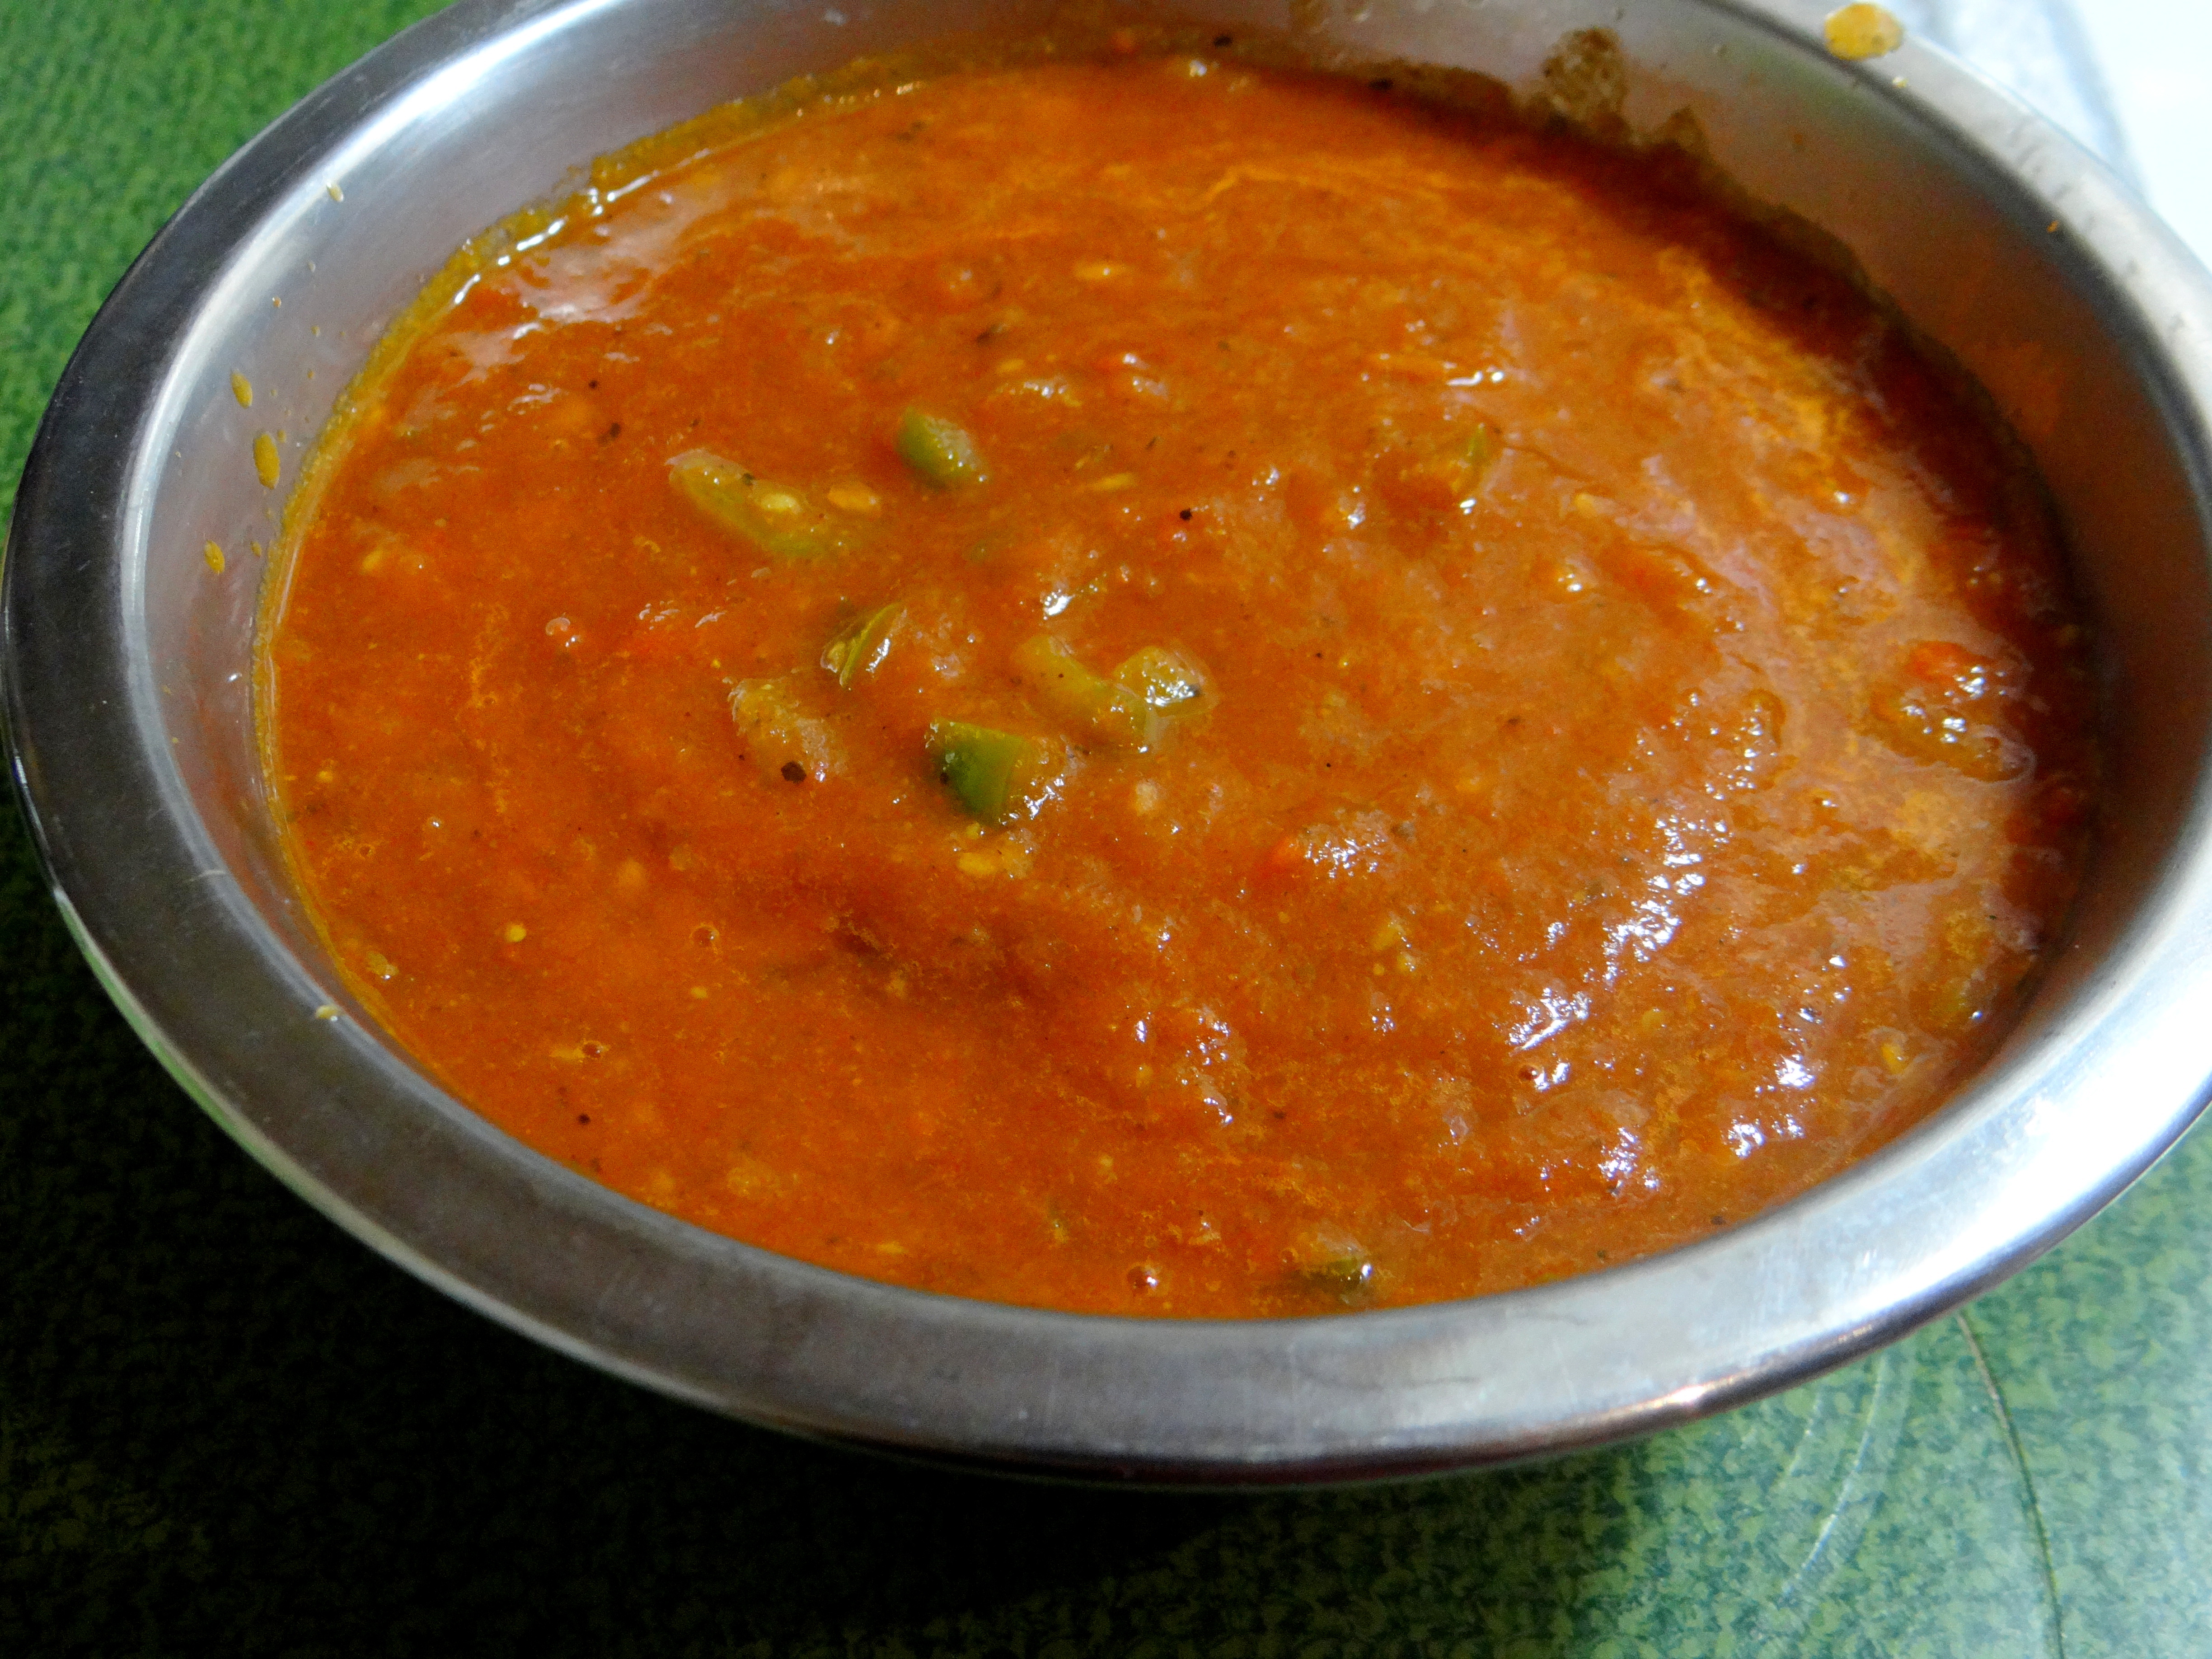
3. Keep aside ½ of the prepared tomato sauce. In the remaining sauce add the rajma beans and ½ cup chopped bell peppers and mix well.
4. Pre-heat the oven to 350 F (180 C approx.)

Roti Bean Enchiladas

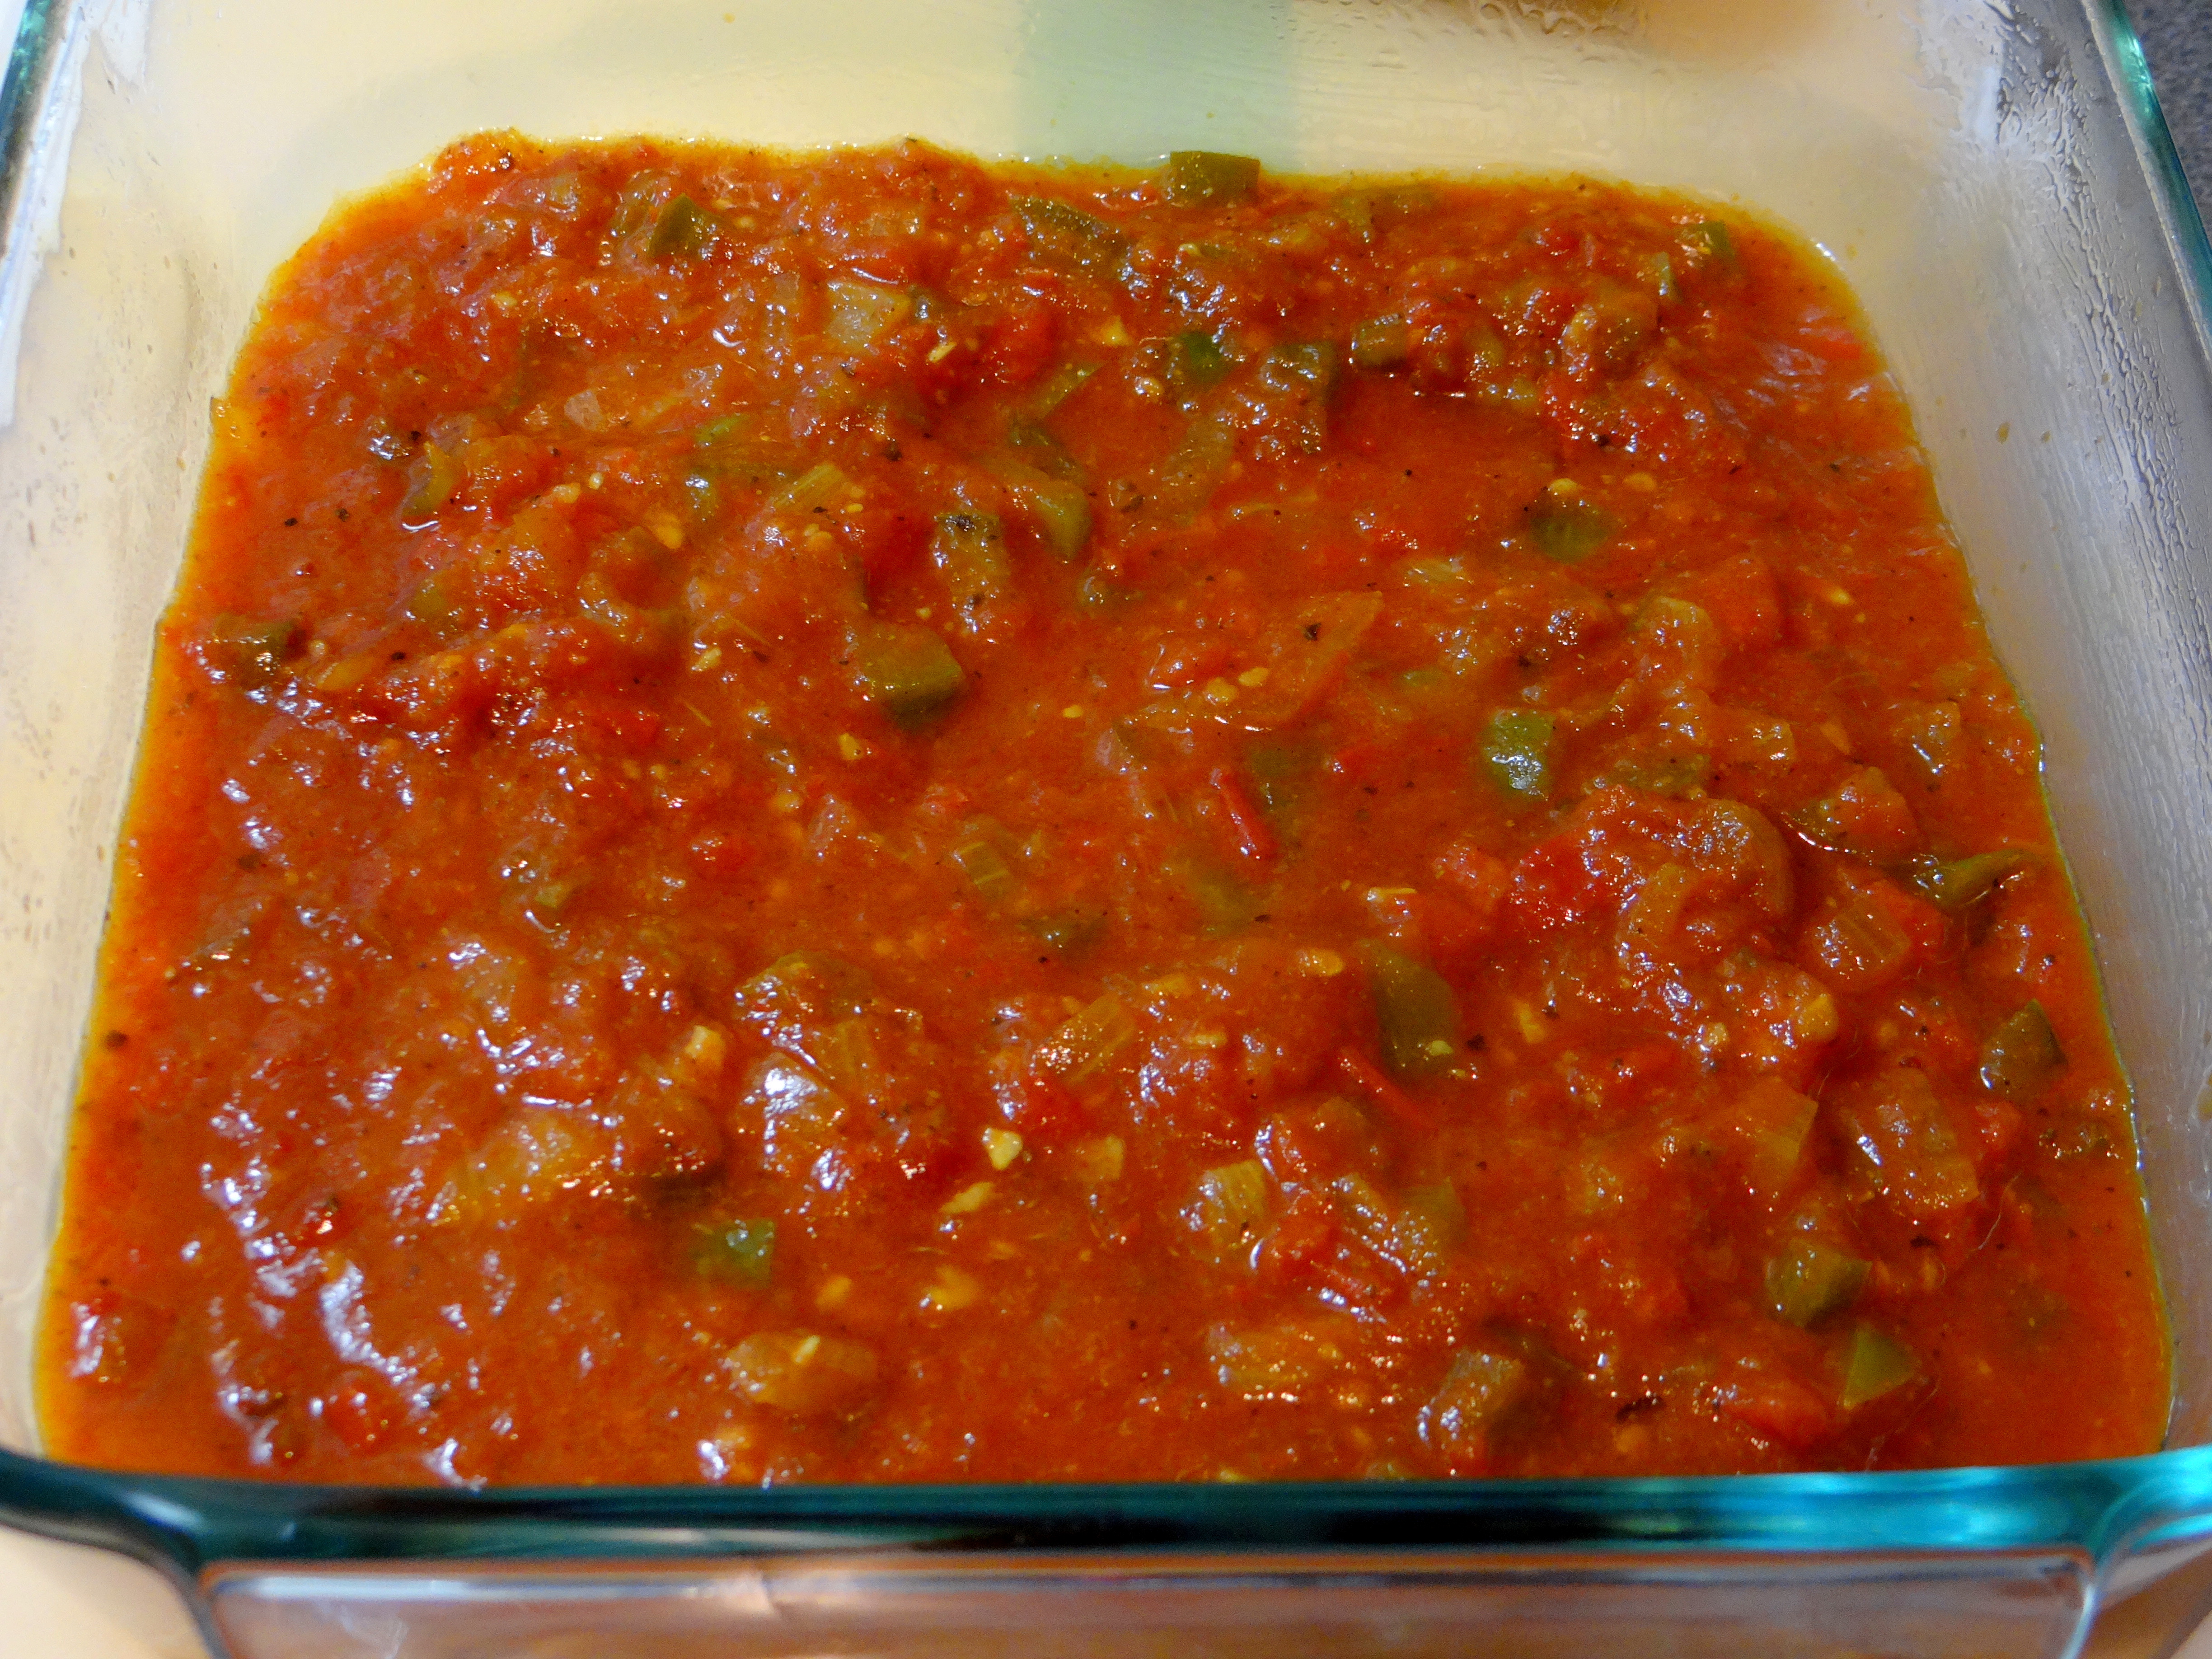
5. Coat an oven proof 13 x 9 inch glass or ceramic baking dish with some cooking oil spray. Spread the prepared sauce in the bottom of the dish.

Roti Bean Enchiladas Roti Bean Enchiladas

6. Spoon 3 tablespoons bean mixture down center of each tortilla and roll up. Toast the rolls on a non-stick pan with 1 teaspoon of oil till light brown on both sides.When the rolls are toasted, they retain their shape and do not become soggy.

Roti Bean Enchiladas

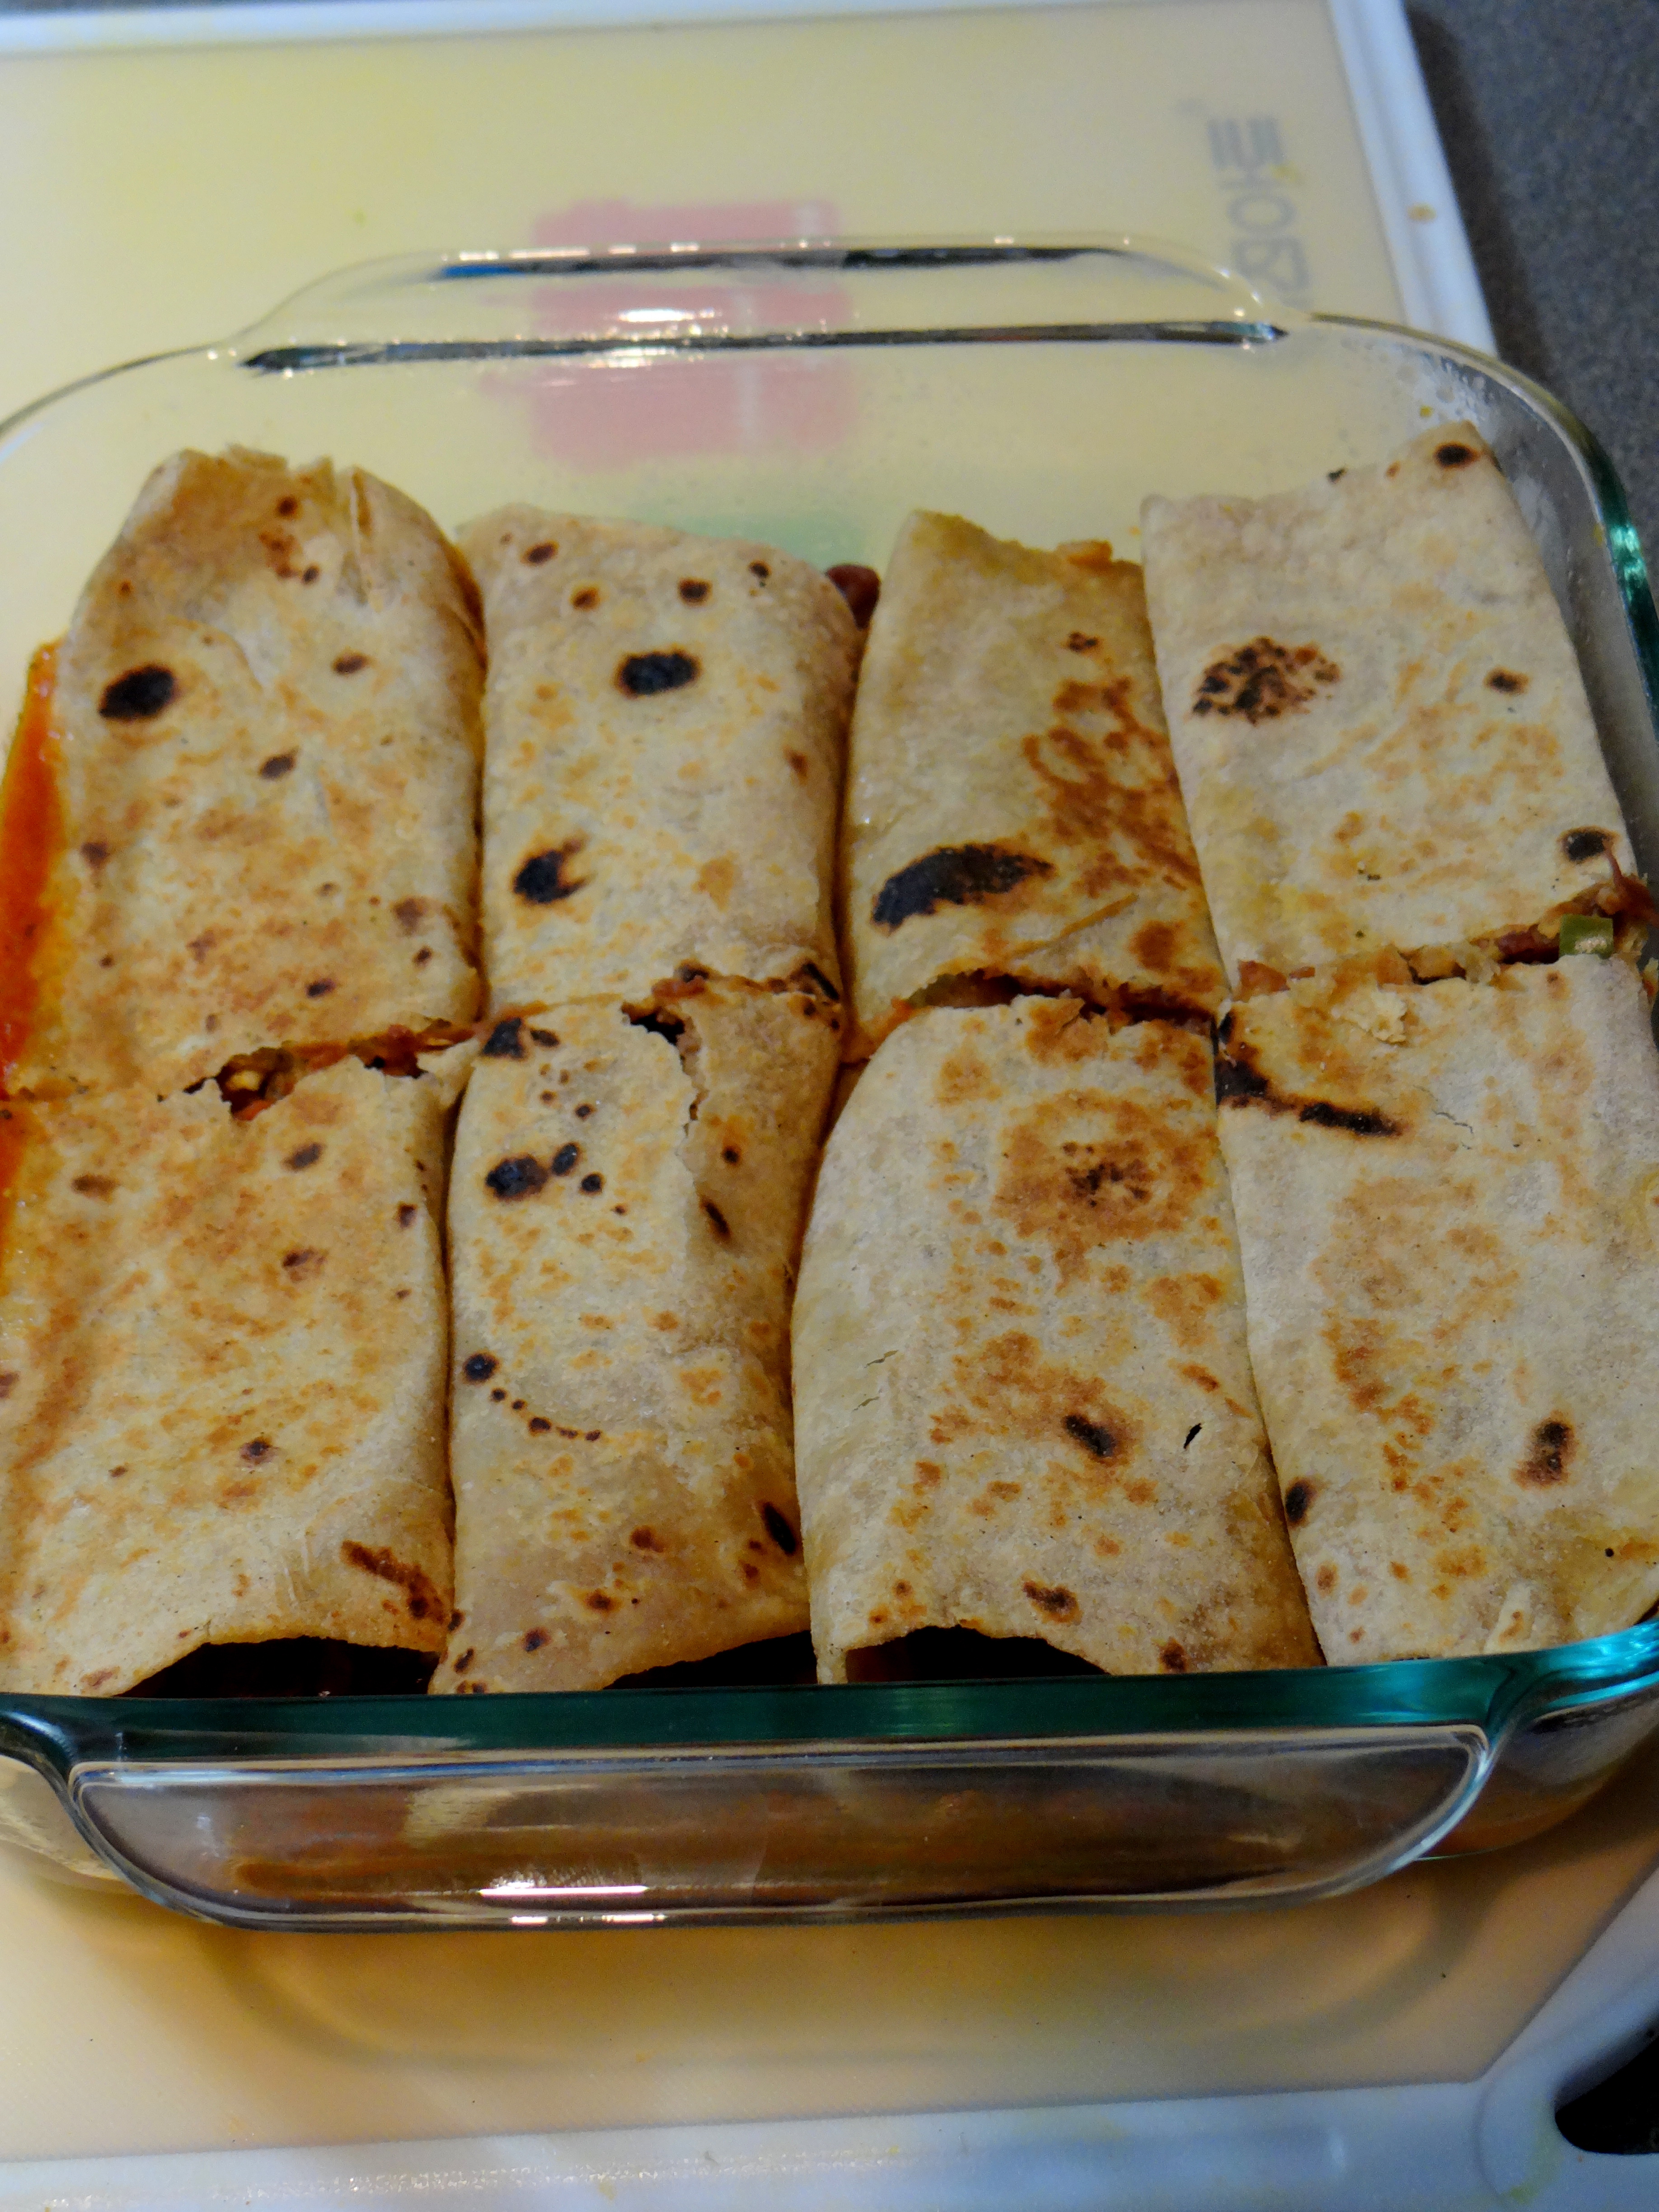
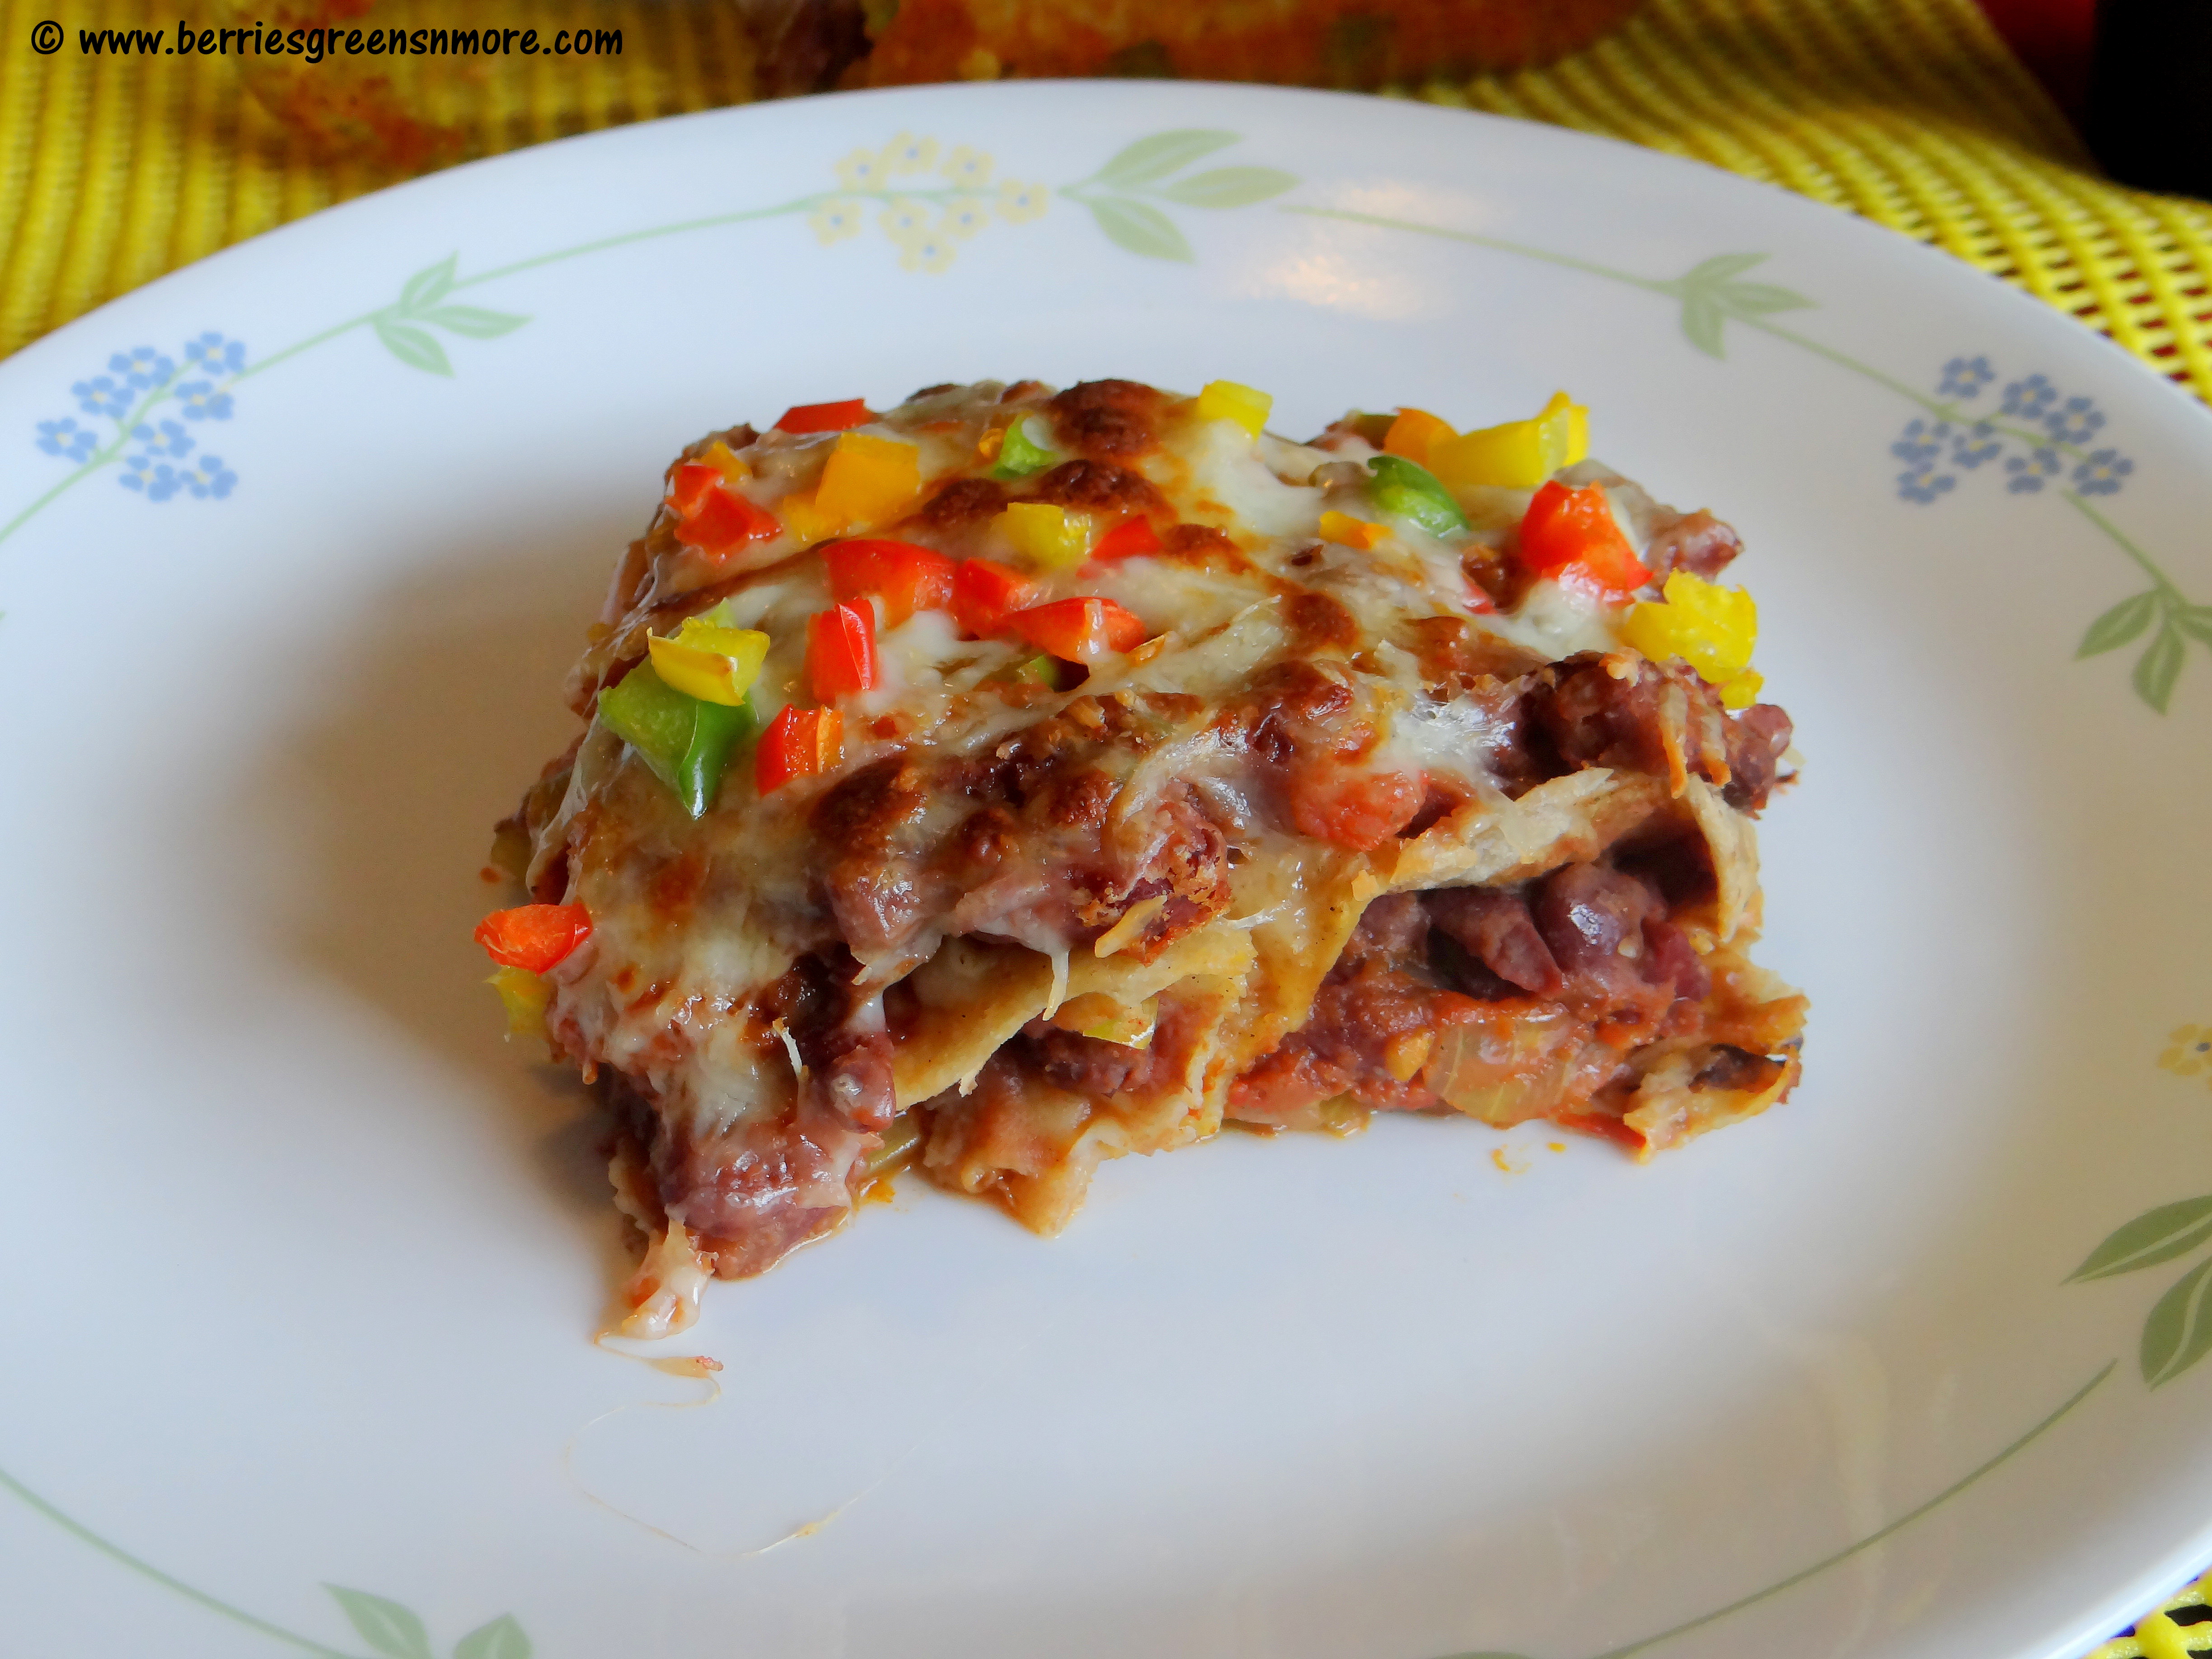
7. Now, place seam-side (opening side) of the rolls down, in prepared dish of sauce. Cut the rolls in the center for easy serving.

Roti Bean Enchiladas  Roti Bean Enchiladas

Roti Bean Enchiladas

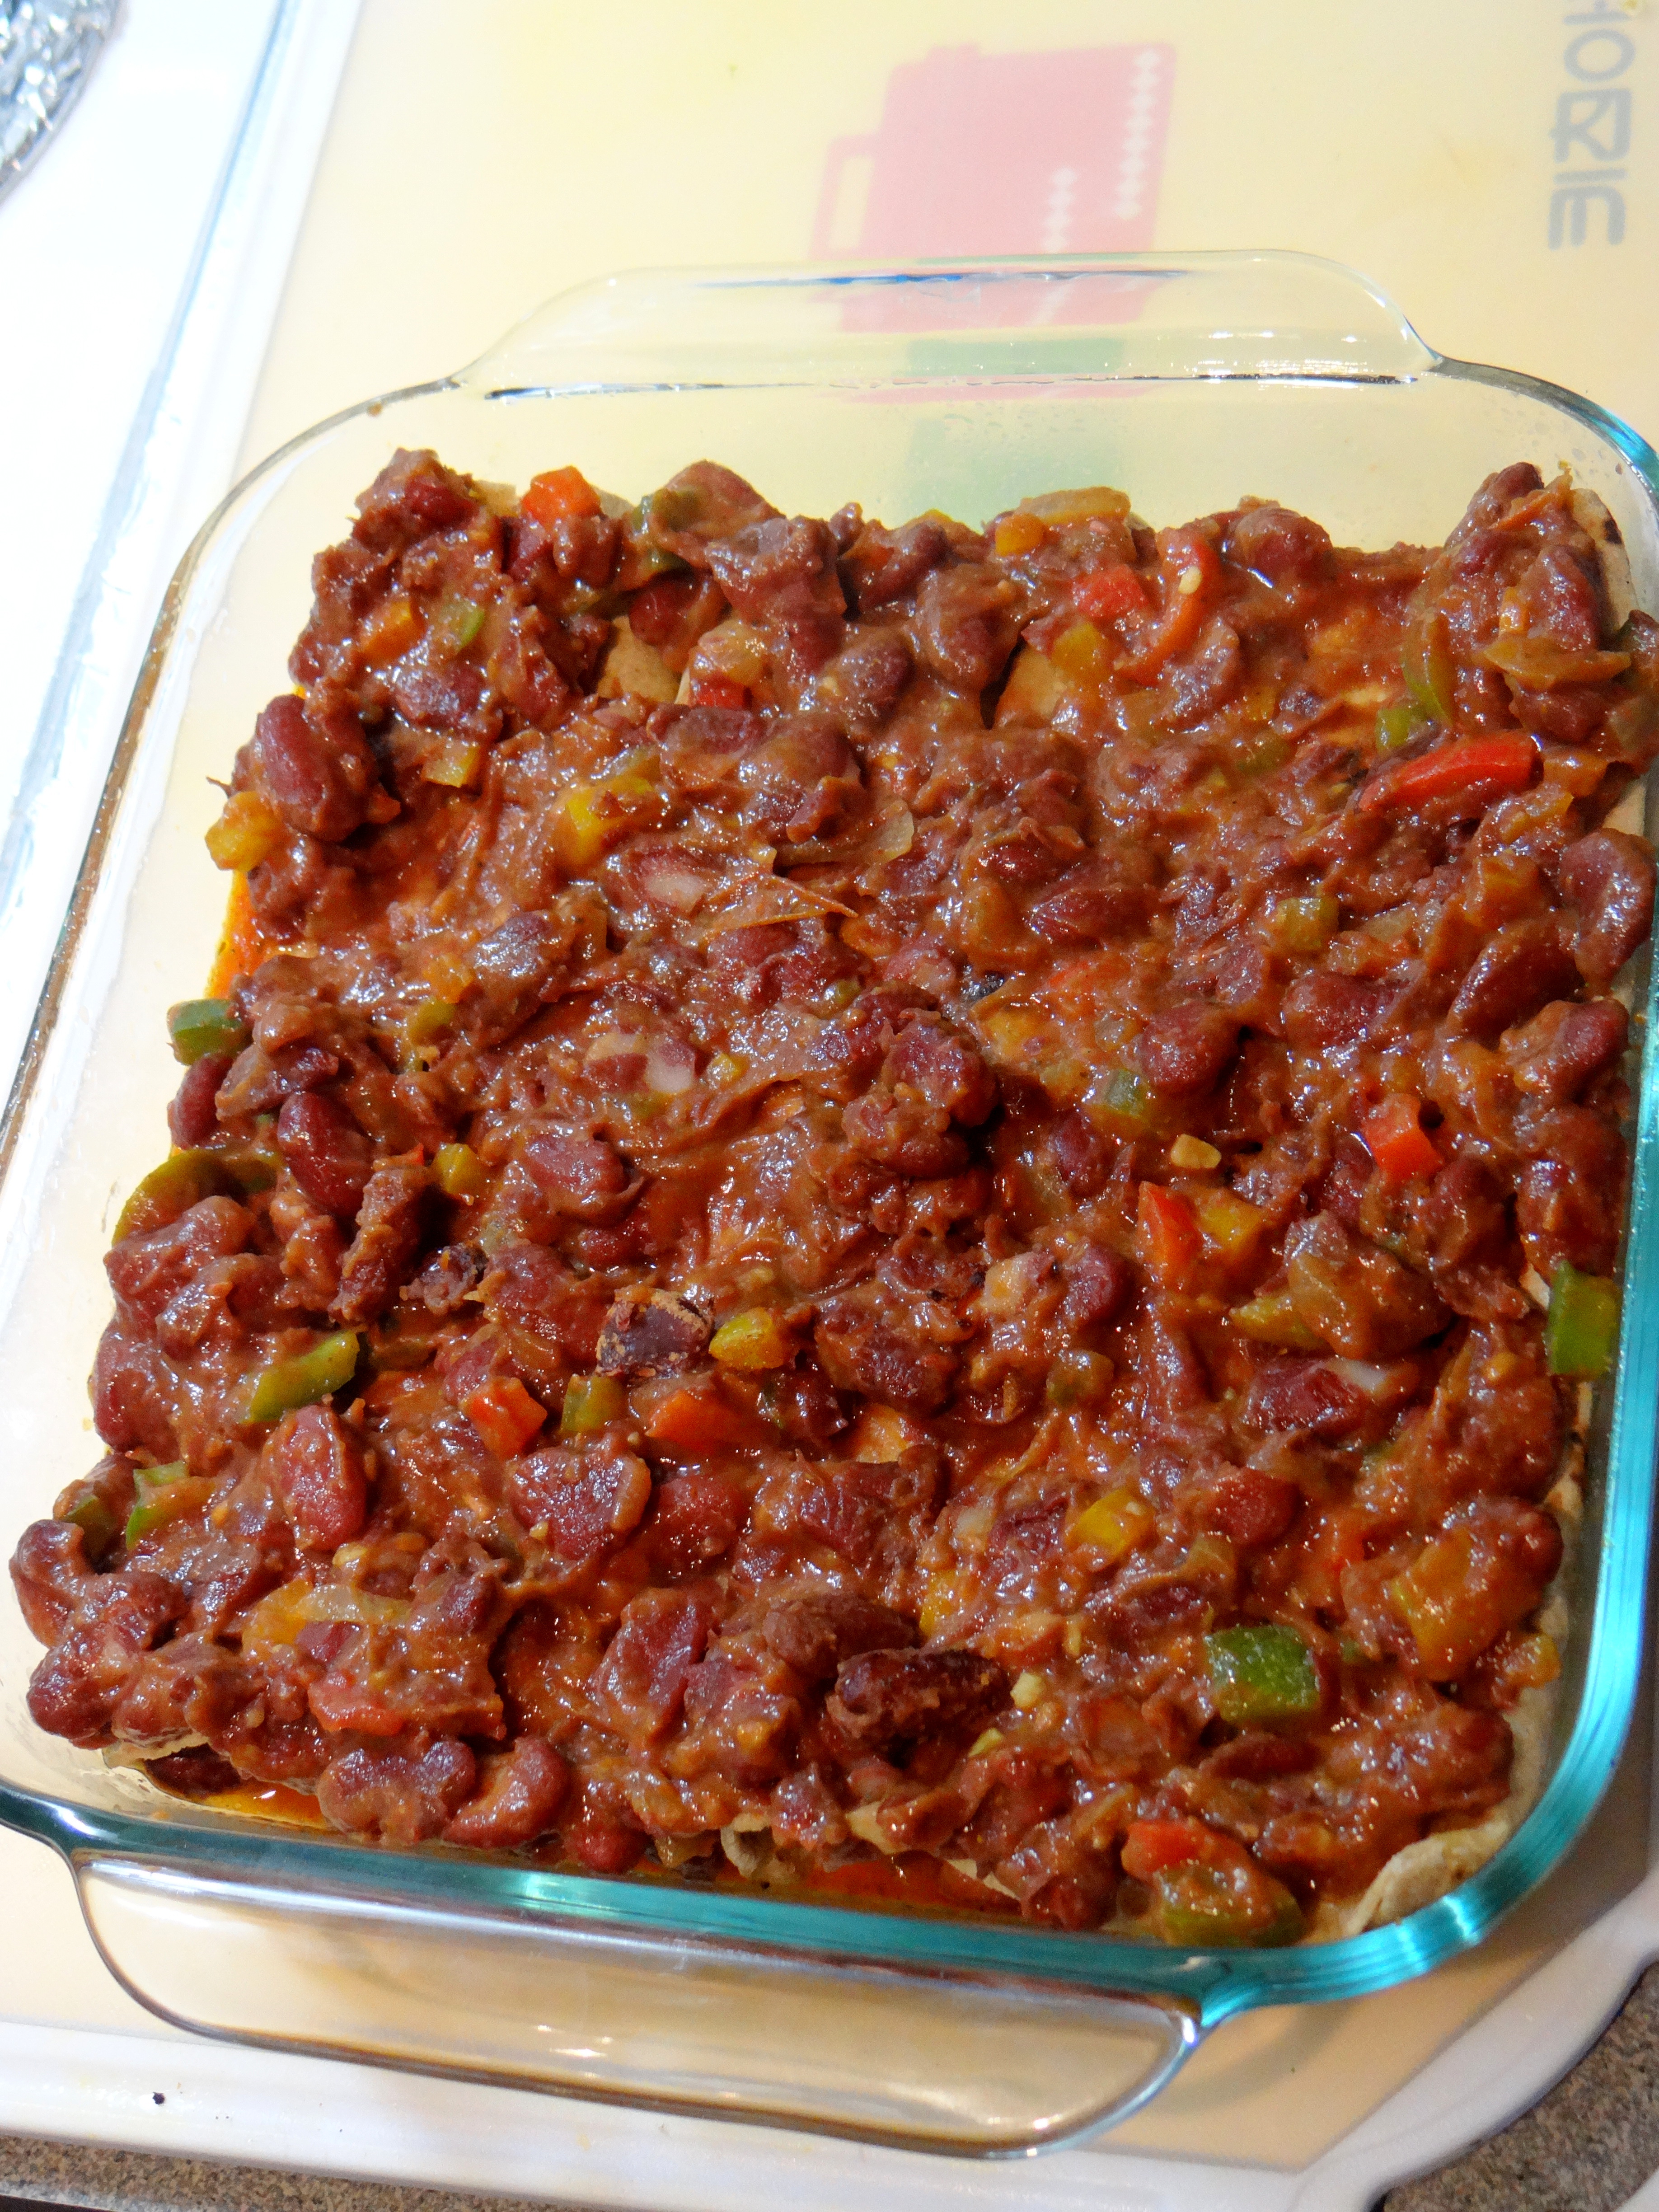
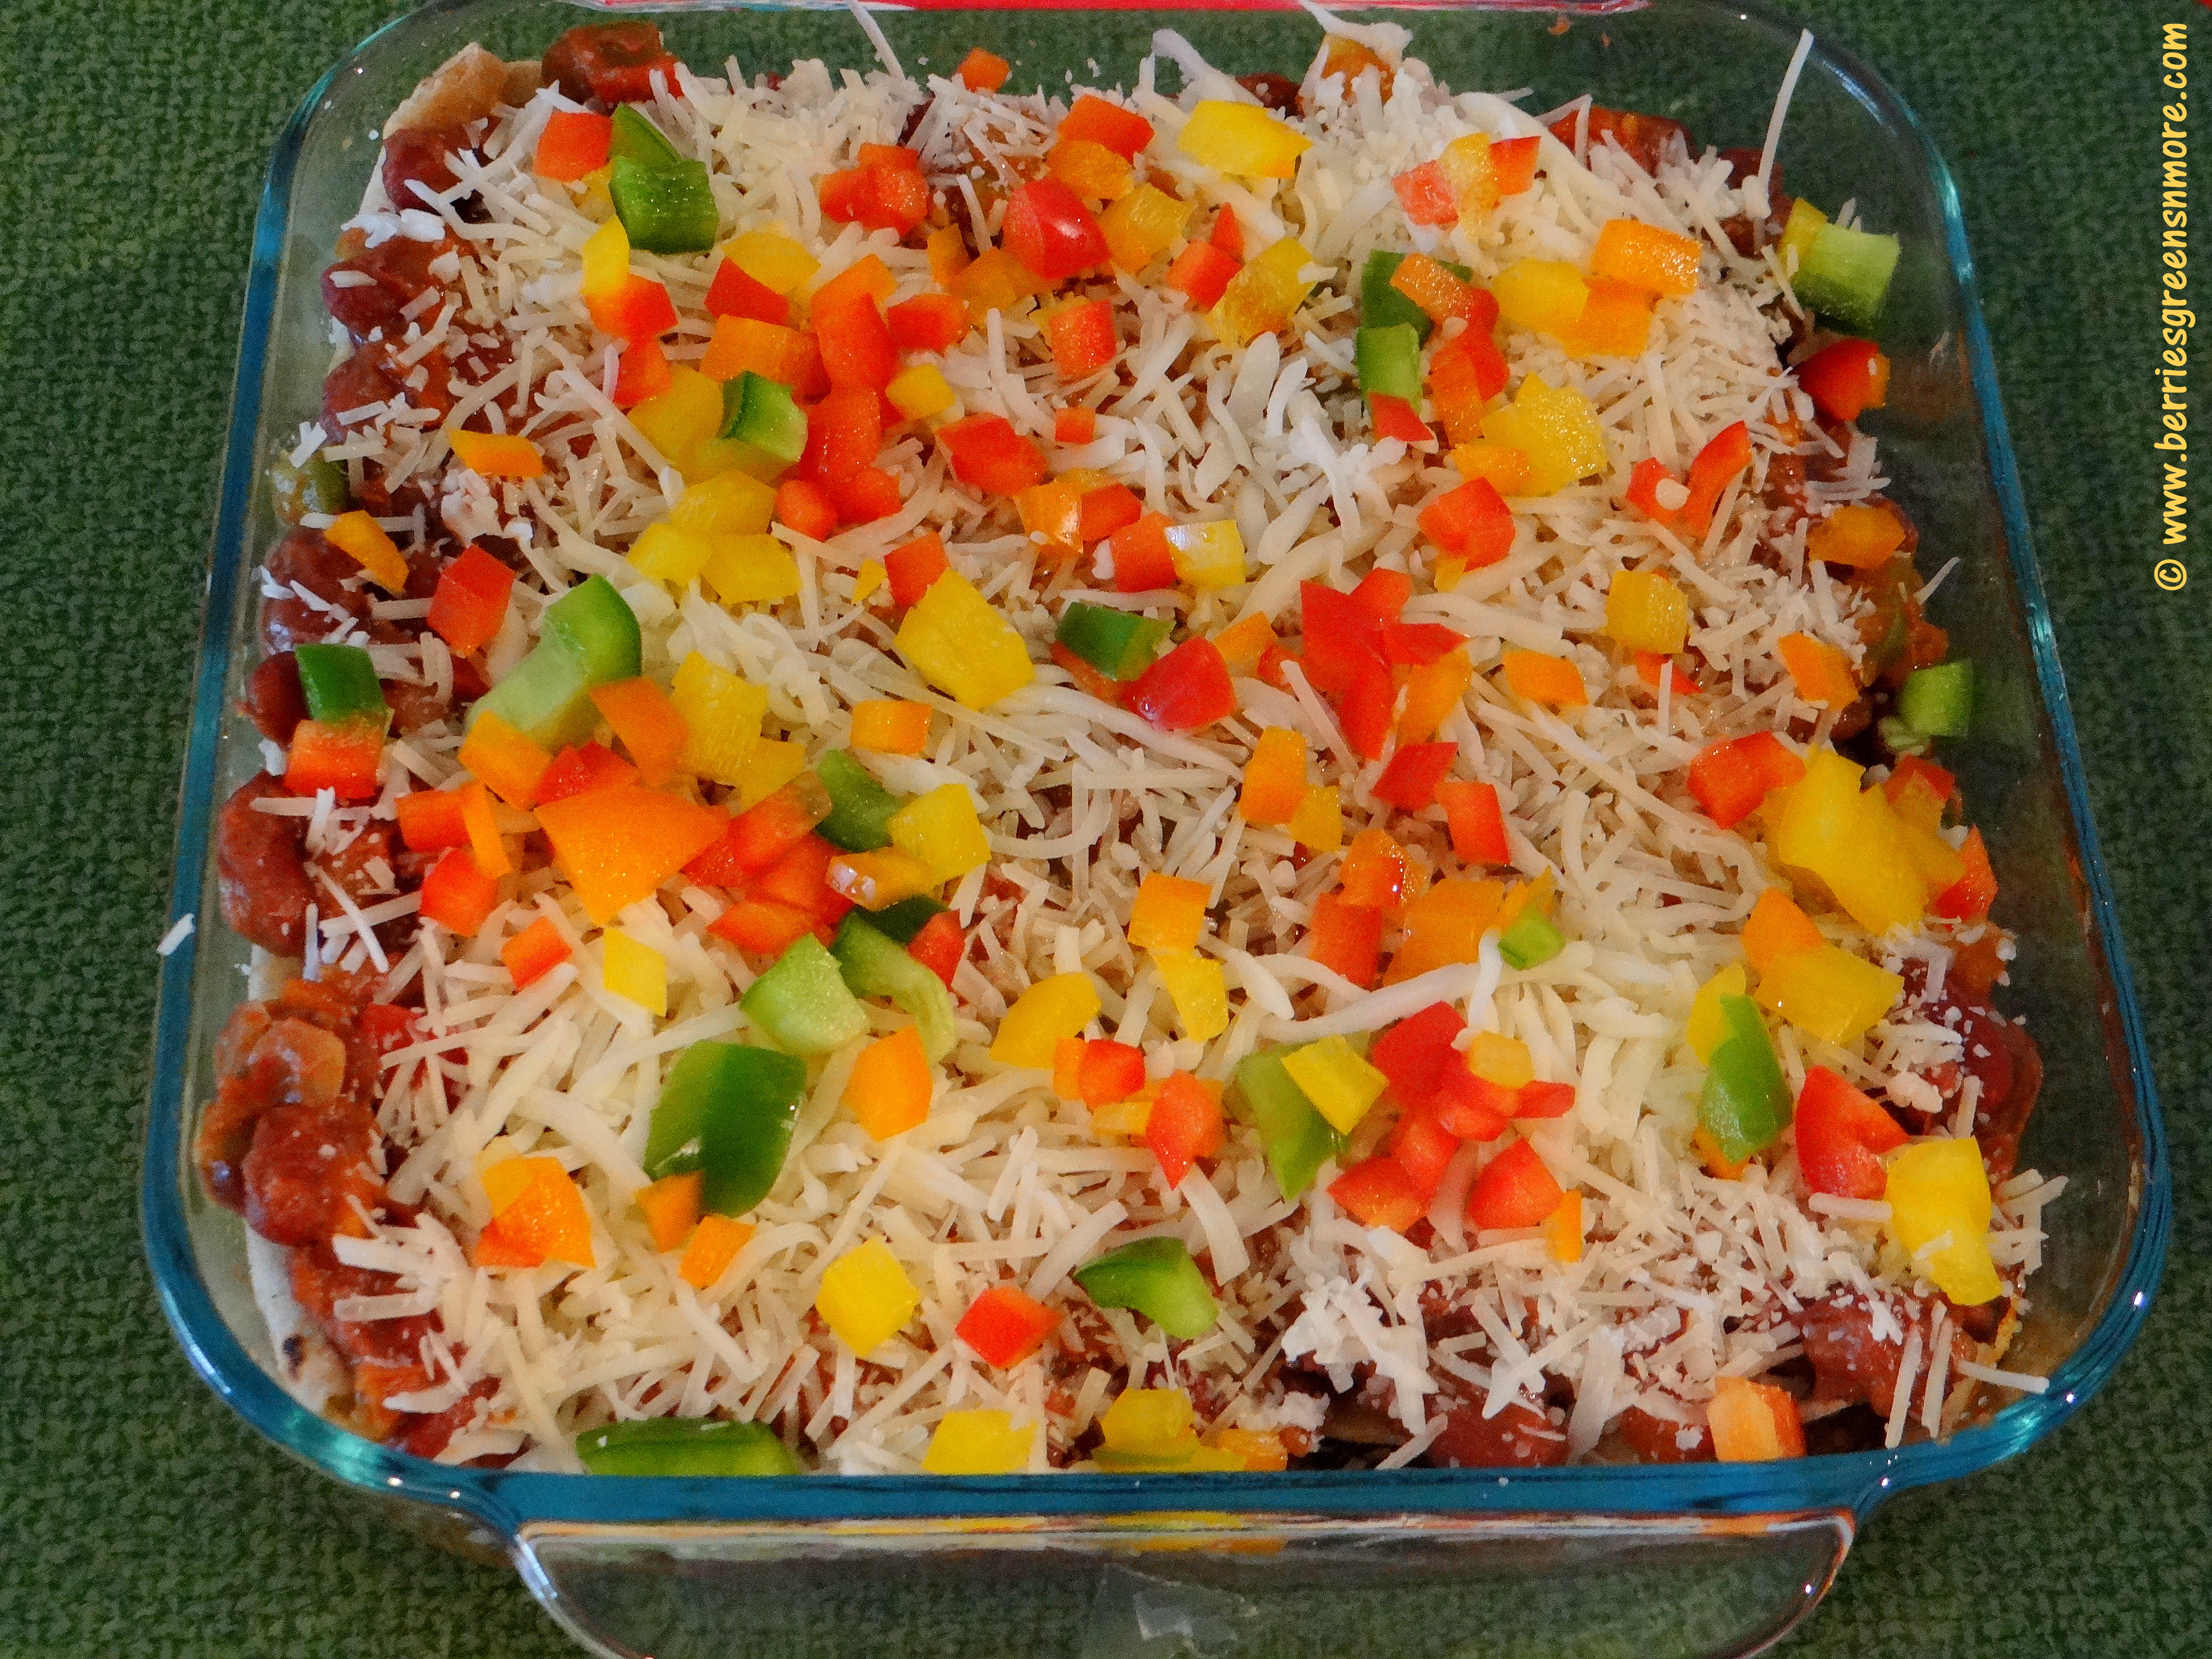
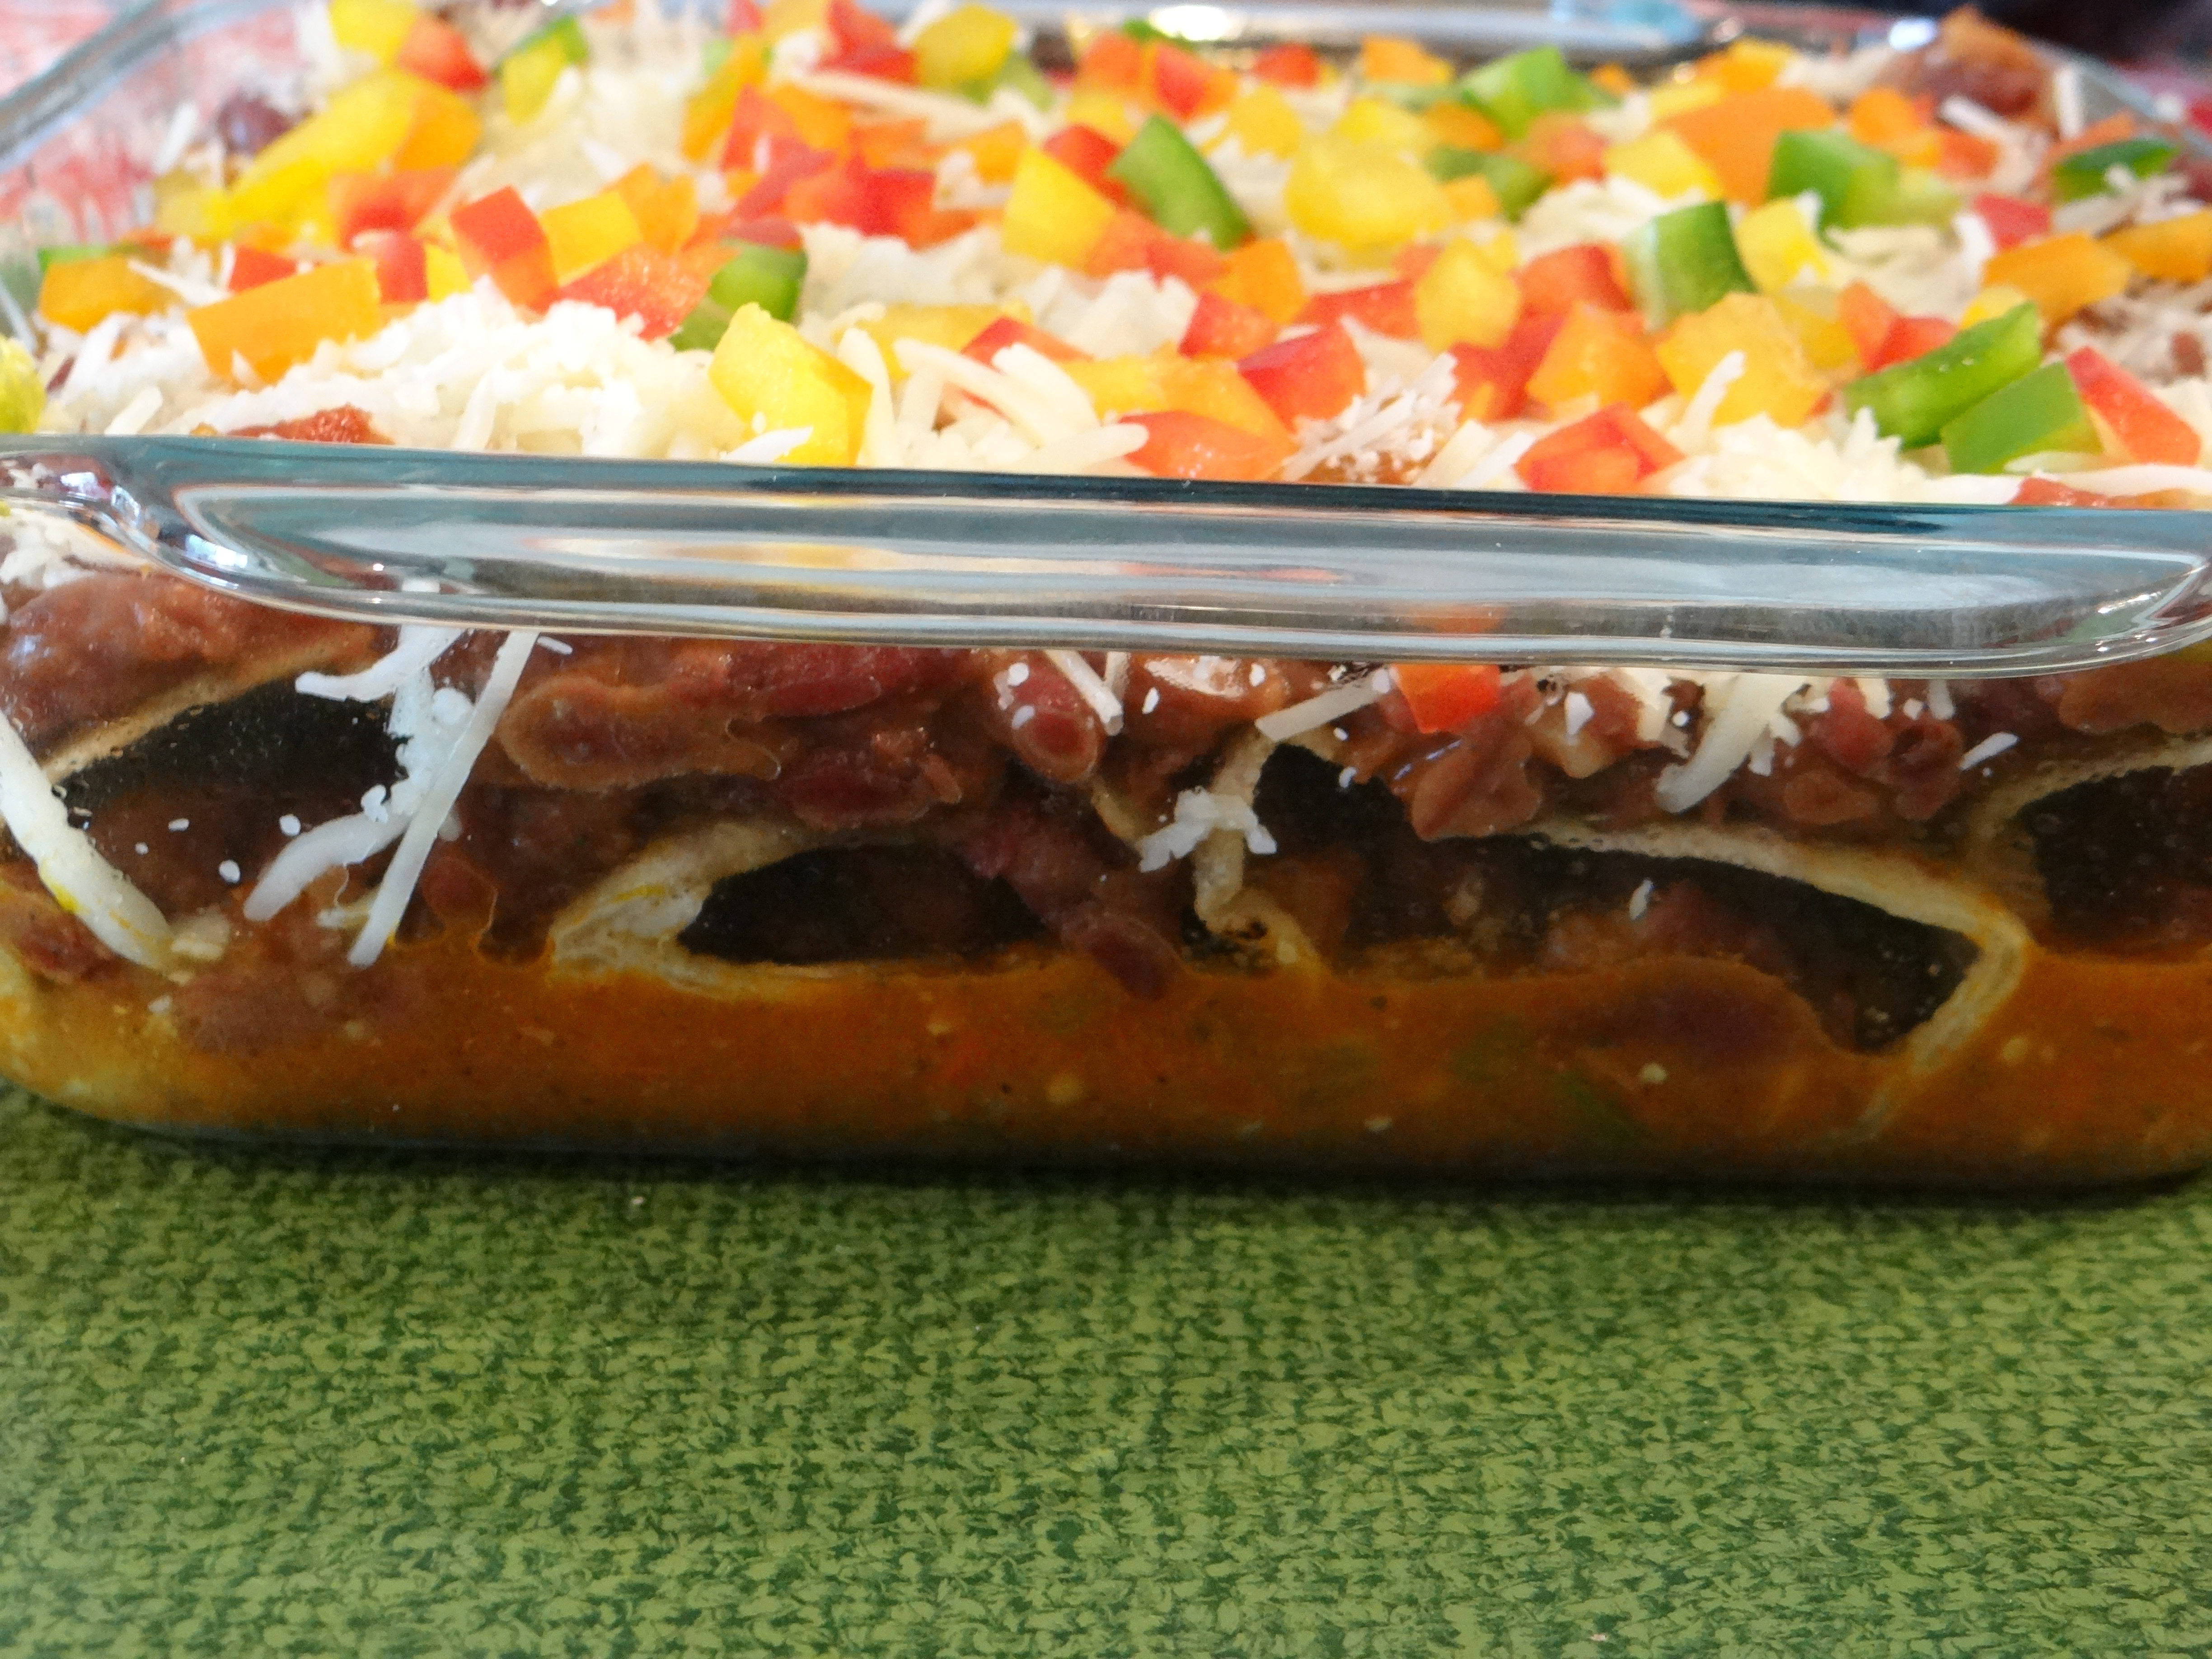
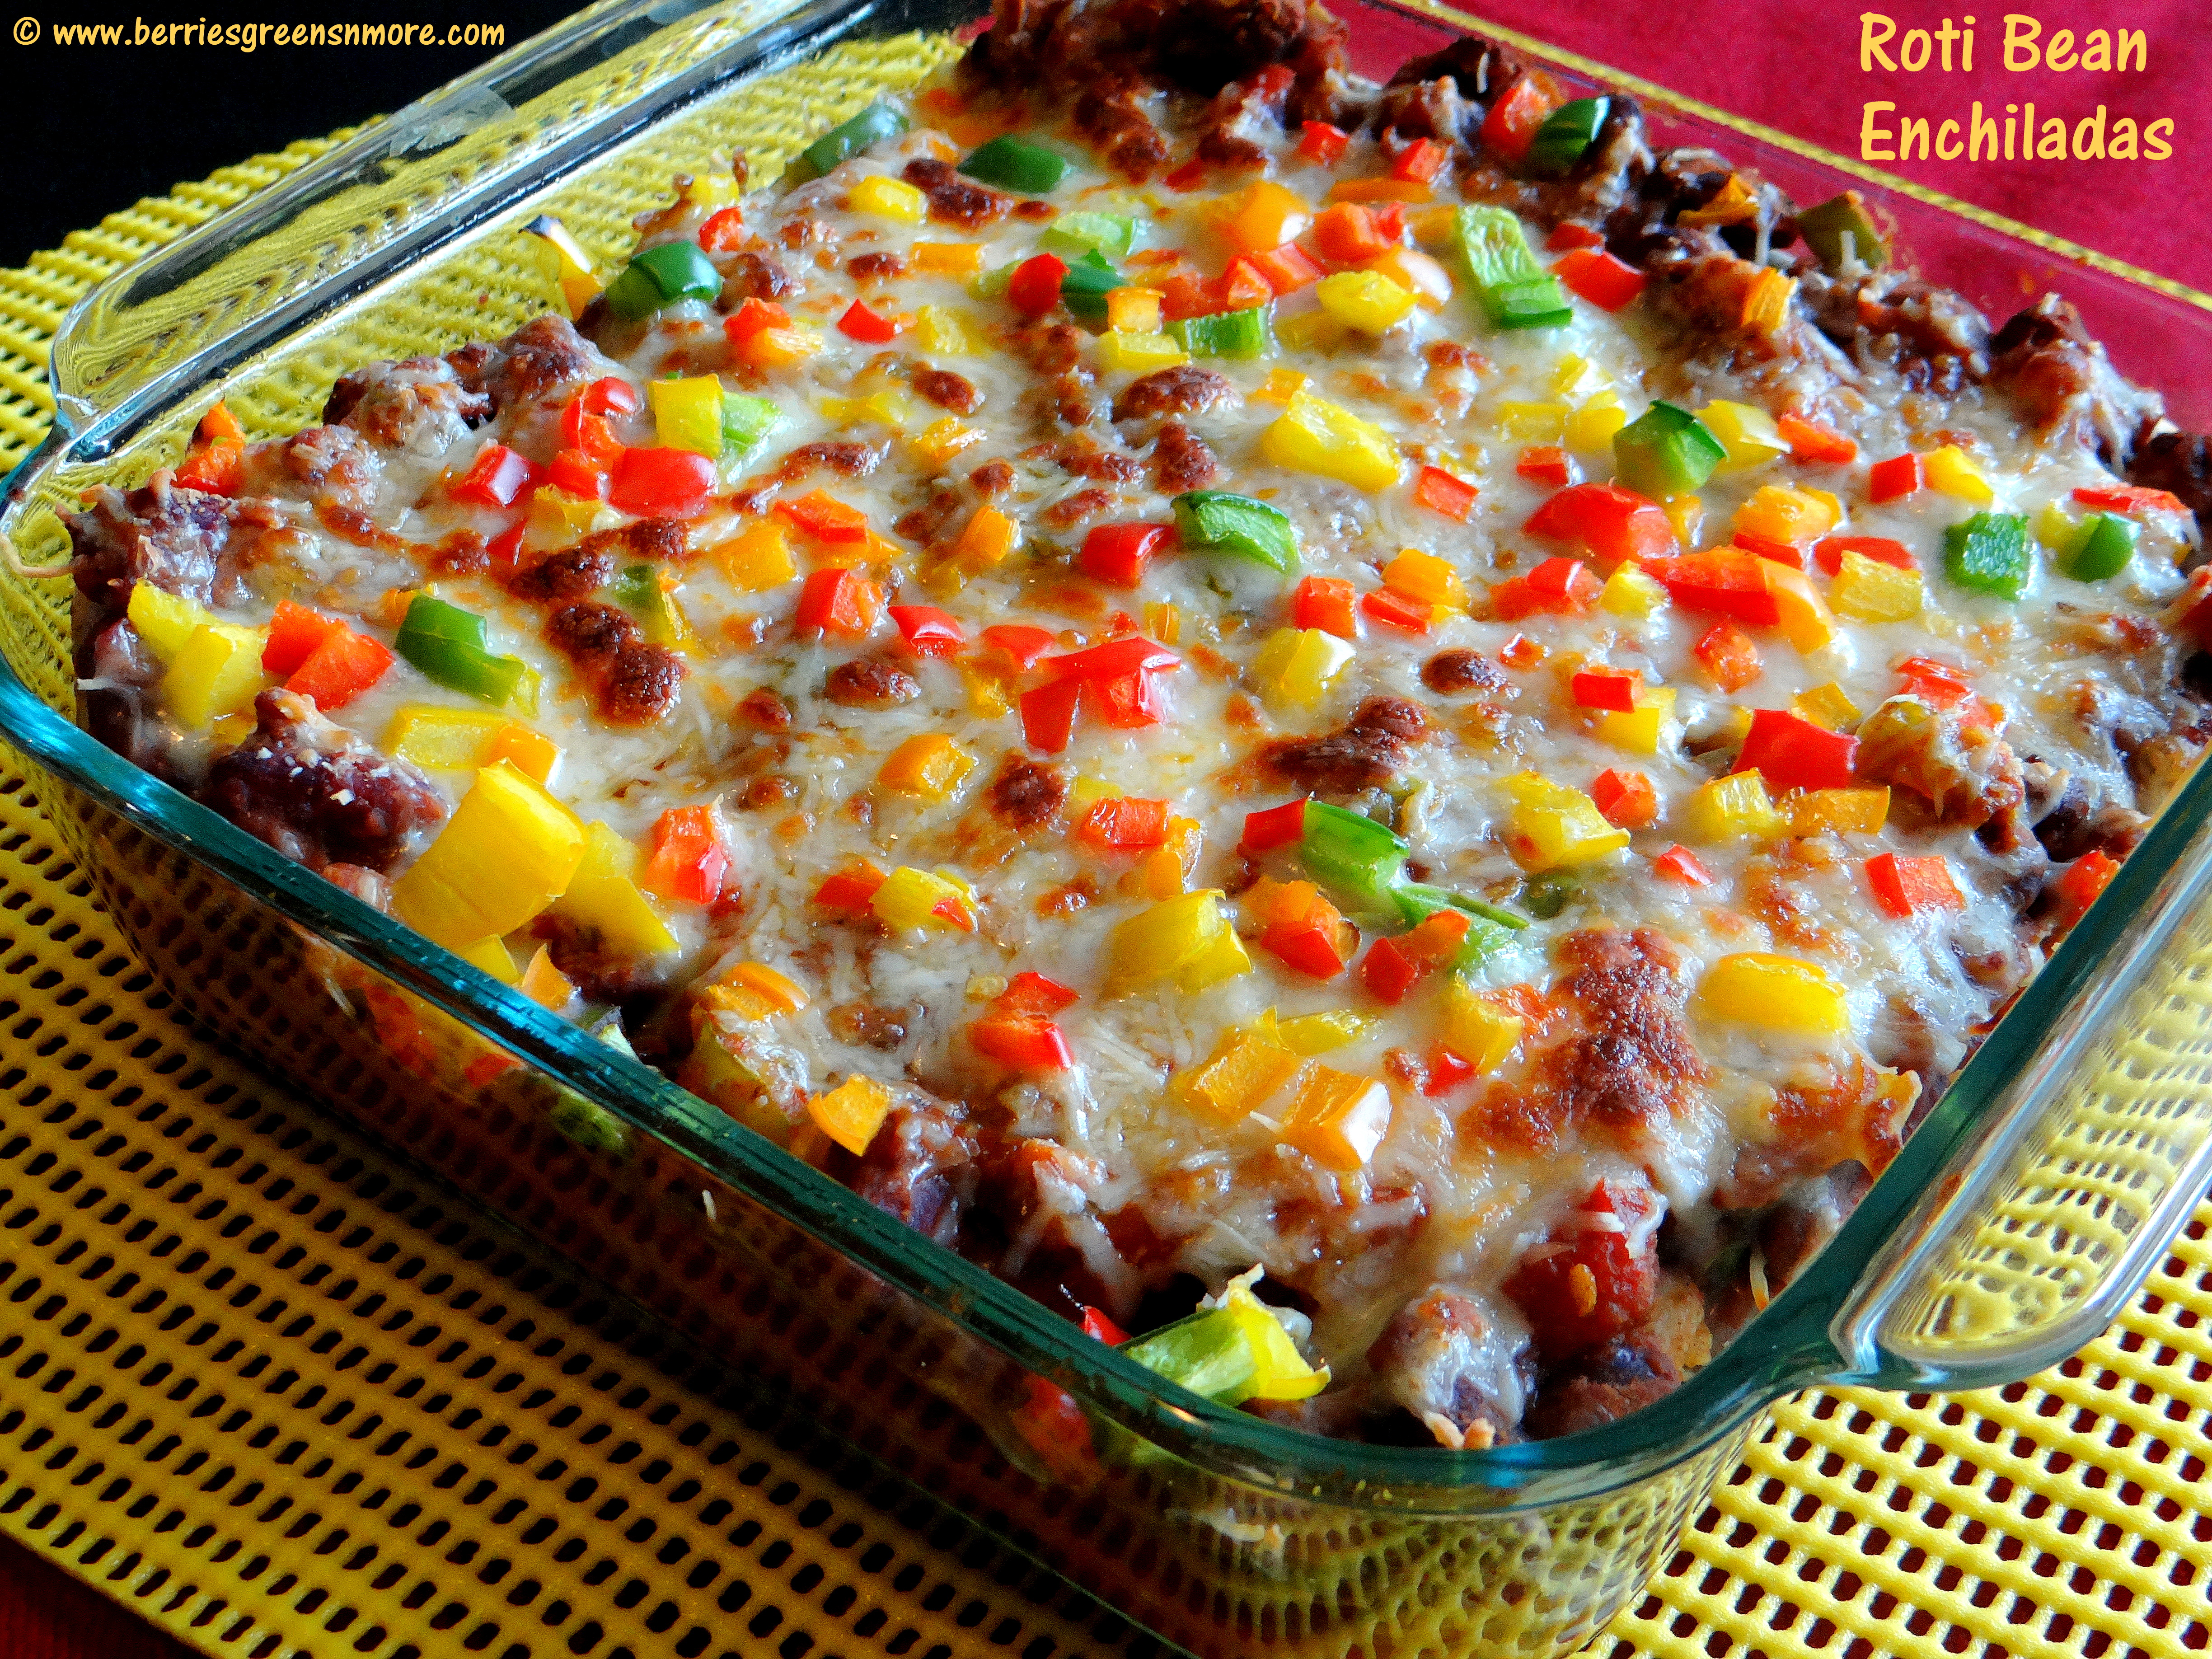
8. Spread the remaining bean mixture on top of the rolls. Top it up with grated cheese and garnish with colored bell peppers.
9. Bake the dish for 15 minutes or until the cheese is golden and melted completely.
10. Once done, remove from the oven. Serve the Roti Bean Enchiladas along with some salad for a perfect lunch or dinner.

Note:
1. Instead of homemade rotis or leftover rotis , store bought tortillas can be used.
2. You can also add in some broccoli and zucchini or any veggie of your choice.
3. Canned Red Kidney Beans (Rajma) can also be used.

Cauliflower Crust Veggie Pizza (Gluten-Free)

Cauliflower Crust Veggie Pizza

This is the Best No Flour Veggie Pizza you will ever make. The secret ingredient is that the crust is made of Cauliflower. Yes you heard me right Cauliflower !! You must be thinking this is joke but No I’m making that claim and sticking to what I say. This indeed is the best pizza you are ever going to have. The idea behind making this cauliflower crust pizza is by doing tons of research online. The whole idea of using cauliflower is a total new quest for me. But this perfect recipe was derived after lot of trials and failed attempts at the cauliflower crust pizza before. Most times, the flavor was amazing but the texture was crumbly and falling apart. The solution to the best crust that doesn’t fall apart and taste like a bread crust is in the squeezing and draining the excess moisture from the cauliflower. And, yes you can slice it and pick it up like a real pizza slice. It’s a guilt free recipe without the all-purpose flour (white poison thats what I call it) and wheat free. The only calorie intense ingredient is Cheese. Okay, it’s a weekend treat for me and my tummy is happy since it is getting fed with all the amazing nutritious veggies so a little cheese here and there is allowed. The best part of this recipe is picky kids who donot like veggies won’t even understand the crust is not the traditional bread and this becomes an ideal way for mommies to sneak in veggies into their diets. What are you waiting for? Lets get started !!

Cauliflower Crust Veggie Pizza

Cauliflower Crust Veggie Pizza

Ingredients: Serves 3
1 large head of cauliflower
1 egg, beaten
1/3-cup shredded part-skim mozzarella cheese
2 tablespoon grated parmesan cheese
½ teaspoon Italian seasoning
½ teaspoon fresh minced garlic
Pinch of salt and pepper
½ cup organic pizza sauce or homemade sauce
¾ cup shredded part-skim mozzarella cheese
Veggies of your choice
(zucchini, broccoli, spinach, onions, red sweet pepper, bellpeppers)
2 teaspoon milk

Method:
1. Preheat your oven to 400 F (approx. 200 Cel)
2. Line a baking tray with a silicone sheet or some parchment paper (no aluminum foil or wax paper)
3. Cut your cauliflower into small florets and pulse it in a food processor to a fine, rice or couscous like texture (about 4 cups of riced cauliflower)

No Flour Veggies Pizza No Flour Veggie Pizza

4. Boil the riced cauliflower in a large pot for 5 to 7 minutes until the cauliflower is nice and tender.
5. Strain the cauliflower in a strainer and wait for the cauliflower to come to room temperature.

No Flour Veggie Pizza

6. Place the cauliflower on a clean washed kitchen towel and squeeze out as much water as you can. This is a crucial step in this recipe, since the crust will hold its shape and not fall apart only when the water is completely squeezed out.

No Flour Veggie Pizza No Flour Veggie Pizza

7. Transfer the cauliflower to a large mixing bowl and add in the beaten egg, 1/3 cup mozzarella cheese, 2 tablespoon parmesan cheese and the dry seasonings. Combine everything together.

No Flour Veggie Pizza

8. Transfer the mixture to the baking tray and shape into a thick rectangle or a thick cylindrical disc of your choice. Do not forget to make the edges a little higher to give it bread crust effect. Brush little milk on top of the crust to give it a brown effect.

No Flour Veggie Pizza No Flour Veggie Pizza

9. Bake it in the oven for 25 to 30 minutes until golden brown.

No Flour Veggie Pizza  Cauliflower Crust Veggie Pizza

Cauliflower Crust Veggie Pizza  Cauliflower Crust Veggie Pizza

10. Top the crust with pizza sauce, veggies and ¾ th cup mozzarella cheese and bake again for 10 minutes or until the cheese has melted.
11. Let it cool for 10 minutes and cut into slices (mine came to about 6 slices). Enjoy Guilt free !!

Note: Approx. 400 calories per serving of 2 slices which is just ½ the calories of a regular flour crust pizza.

Broccauliflower Veggie Rice (No Grain Version)

Broccauliflower Veggie Rice

You must be wondering Rice but no grain version. Confused….Let me break the suspense. This ‘rice’ isn’t rice at all. It’s a super big hunk of Cauliflower and Broccoli that’s been grated fine into a rice texture. To give the broccoli and cauliflower a fried rice resemblance, it’s important to extract the excess water from the grated vegetables prior to cooking. This dish is perfect for people on a low carb diet or who want to enjoy nutritious food. This is a good way to sneak in some veggies in your child’s diet. This rice but no rice dish is flavorful and loaded with lots of veggies and a hint of aromatic spices. Well, if you’re a rice fanatic, this cauliflower rice recipe will be a tasty and satisfying non-grain alternative. In fact, when I first made this I was amazed by the taste and texture that I swapped it with my regular Indian breakfast menu. I was first introduced to the amazing concept of a no-grain rice by my fitness expert. It’s since become a favorite of mine! I have given the original recipe a little Indian twist to satisfy my taste buds. Believe me, you will go Ga Ga over this dish. So, lets start cooking !!

Broccauliflower Veggie Rice

Broccauliflower Veggie Rice

Ingredients: Serves 2
1 large head Cauliflower
1 medium head Broccoli
1 cup chopped veggies (peas, corn kernels, carrots, broccoli florets)
½ finely chopped onions
¼ teaspoon grated ginger
2 to 3 green chillies as per taste
Salt as per taste
1 Bay leaf
2 to 3 cloves
2 Cardamom pods
1 small cinnamon stick
¼ teaspoon Cumin seeds
1 tablepoon Olive oil

Method:

Broccauliflower Veggie Rice

1. Cut the cauliflower and broccoli into florets, discarding the tough inner core. Working in batches, pulse the cauliflower and broccoli in a food processor until it breaks down into rice-sized pieces. You should have approx. 5 cups of cauliflower and broccoli “rice.”

Broccauliflower Veggie Rice

2. In a deep bottom pan, heat water till bubbly and switch off the flame. Put in the riced cauliflower and broccoli into the boiling water and close the lid of the pan. Let it sit for 5 minutes. Do not allow it to sit too long or else the cauliflower and broccoli will be over cooked and will turn out to be mushy consistence instead of grainy.
3. Drain the water from cauliflower and broccoli by placing them on a strainer. Now, remove the excess water by placing the riced cauliflower and broccoli on a absorbent paper or kitchen towel and squeeze off the excess water.
4. This excess drained water can be stored and used for making soups. It is very nutritious.

Broccauliflower Veggie Rice  Broccauliflower Veggie Rice

5. In the same deep bottom pan, heat olive oil. When the oil is hot add in the cumin seeds and when the cumin seeds change color, add in the bay leaf, cinnamon stick, cardamom pod, coves and stir in for 30 seconds.
6. Now, add in the grated ginger , green chillies, chopped onion and the remaining veggies. Stir in for 2 minutes till the veggies turn out to be half cooked.

Broccauliflower Veggie Rice

7. Add in the riced cauliflower and broccoli and stir in on high heat for 1 to 2 minutes so that if there is any excess water, then it will get dried off and you will get this amazing fried rice or couscous or upma consistency dish.
8. Serve it hot hot and enjoy it as a substitute to your regular rice or swap it with your breakfast menu.
9. I love, to have it as a replacement to Rice with some curried lentils or stir fry veggies on the side.

Note:
A cup of riced cauliflower and broccoli has only 25 and 31 calories versus white rice 204 calories.

Ref:
https://www.fatsecret.com

Waffle Uthappam

Waffle Uthappam

Can Waffles be Savory? Yes, they can and guess what they taste super delicious with some spicy chutney or a dip. I usually prefer some kind of hot breakfast in the morning. When I woke up this morning, I wanted to have Vegetable Uthappam. I had some Dosa batter in the refrigerator. All of a sudden, while taking out the pan for making the uthappams; my eyes went on the Waffle maker sitting next to the pan. I thought why not make some savory Waffle Uthappams. So here, it is my version of a Savory Waffle Uthappam that taste so delicious and I am sure it will become a part of every family’s regular breakfast menu. So what are you waiting for ?  Lets get started !!

Waffle Uthappam

Ingredients: Serves 2
2 cups Dosa Batter
2 tablespoon finely chopped onions
2 tablespoon grated carrots
2 tablespoon finely chopped green bellpeppers / capsicums
1 teaspoon finely chopped coriander leaves
1 green chilli finely minced (add more or less as per taste)
½ teaspoon Idli-Dosa Chutney powder/ Milagai Podi (optional)
¼ teaspoon turmeric powder
Salt as per taste
Water to adjust the consistency

Method:
1. Take the Dosa batter in a bowl. Add the chopped vegetables, coriander, chilli, chutney powder, turmeric and salt. Mix well. If batter is thick, add 1 or 2 teaspoon of water to adjust the consistency.

Waffle Uthappam

2. Pre-heat the Waffle maker according to your brand instructions.
3. When ready, spray some non-stick coconut oil on both the sides of the waffle maker.

Waffle Uthappam Waffle Uthappam

4. Pour 1 cup of prepared Uthappam batter on the waffle maker.
5. Close the lid and set it to the desired setting. I like my waffles to have some color but not very crispy so I set it to level 3 as per my waffle instructions. It takes about 5 minutes for the waffle to get ready with crispy edges and still soft like a Uthappam from center.

Waffle Uthappam

6. When ready, serve hot with a chutney or dip of your choice. Enjoy !!

Notes:

1. You can use your own recipe for making Dosa batter or even use store bought.
2. Any other choice of vegetables can also be used.

Kale Cabbage Soy Bites (Air Fried)

Kale Cabbage Soy Bites are a high power packed protein snack which is perfect for anytime snacking. My husband just loves this snack and can just have countless of them. They are also perfect as a party starter. Kale, Cabbage and Soy make it a wholesome meal in itself. Being Air Fried rather than deep fried makes them even more nutritious and healthy. This is perfect for Vegans and Vegetarians who are always on the lookout for different ways to add more protein to their diet. I’m sure even a non-vegetarian would love this snack. These bites can also be packed for school lunch box. Serve them hot with a chutney or dip of your choice.

Did you know: Kale is a super healthy green King. Its loaded with vitamins, minerals and antioxidant properties.

Green Cabbage also contains vitamins, minerals and helps in controlling blood pressure, helps lose weight in a healthy way.

Red Cabbage contains essential dietary fibre, vitamins and minerals. Promotes good health and boost the immune system.

Soy Chunks/ Granules are perfect for vegans and vegetarians who forgo the consumption of meat and who are always looking for alternatives to meet their nutritional needs. Soy chunks are made from soy beans and they work well as a meat substitute. They are power packed with protein, calcium and iron.

Nutritional Yeast is perfect for vegans since it is an alternative to regular cheese.

Kale Cabbage Soy Bites

Ingredients: Serves 2 to 3

1 cup Kale leaves finely chopped
1 cup chopped Red and Green Cabbage
½ cup Gram Flour / Besan
3 tablespoon Rice Flour
½ cup Soya chunk mince
½ teaspoon Coriander-Cumin powder
½ teaspoon Garam Masala Powder
Red chilli powder as per taste
½ teaspoon Tumeric powder
Salt as per taste
1 teaspoon Nutritional Yeast or grated cheese (if not vegan)
2 teaspoon Olive Oil (divided)
3 to 4 tablespoon of Water for kneading

Method:
1. To prepare the Kale Cabbage Soy Bites, first soak ½ cup dry soy chunks in warm water for 15 minutes. When the soy chunks puff up, squeeze out all the excess water by pressing the chunks between the two palms and chop it fine in a blender or a food processor.

Kale Cabbage Soy Chunks Kale Cabbage Soy Chunks Kale Cabbage Soy Chunks

2. In a large mixing bowl combine all the vegetables, dry masala, flour, 1 teaspoon olive oil and bind together to form a dough like mixture with the help of some water.

Kale Cabbage Soy Chunks Kale Cabbage Soy Chunks

3. Divide the mixture into equal portions and shape each portion into small size balls.
4. Check the spice and salt to suit your taste.
5. Preheat the Air Fryer to 390 F or 200 C (approx.). Place the Kale Cabbage Soy Bites into the Air Fryer and gently brush them with the remaining 1 teaspoon of olive oil. Bake them for 15 minutes or until outer layer turns crisp and brown.

Kale Cabbage Soy Chunks Kale Cabbage Soy Chunks Kale Cabbage Soy Chunks

6. Alternatively these bites can also be baked in preheated oven, Paniyaram Pan or even shallow fried according to your preference.
7. When done, transfer the Kale Cabbage Soy Bites to a serving platter and serve hot with chutney or dip of your liking.

References: http://authoritynutrition.com/10-proven-benefits-of-kale/
https://www.organicfacts.net/health-benefits/vegetable/health-benefits-of-cabbage.html
https://www.organicfacts.net/health-benefits/vegetable/red-cabbage.html
http://healthyeating.sfgate.com/nutritional-value-soya-chunks-2216.html

All Natural ‘Instant’ Homemade Ice creams (Vegan friendly)

The weather is getting warmer here and my taste buds are craving for some Ice Creams. But if you are lactose intolerant, Vegan or just trying to eat healthier, then all that dairy, cream and sugary store bought ice creams can really get in the way of reaching your health goals. Why fear? with just some simple alternatives we can make several ice creams that are not only healthy, low calorie, dairy free, gluten-free, sugar-free but also satisfying, guilt-free and delicious.

Below are my four (yes you heard it right four !!) varieties of ice cream alternatives that are made with fresh fruits ,natural sugars and ‘NO’ cream, gelatin, eggs, nasty sugars. Ice creams made at home add in a long list of nutritional benefits. All you require is a blender, fresh frozen fruits and a dairy-free liquid base. Lets get started !!

Vegan Friednly Ice Creams

Banana Cinnamon Nut Delight

2 Ripe Bananas
½ cup unsweetened Coconut Milk
Chopped Nuts (Brazil Nuts & Walnuts) – 2 tablespoon
Cinnamon powder – ½ teaspoon

Peel the bananas, cut them in small dices and put them in a freezer bag and freeze them for 5 hours. For making the ice cream, in a blender add the chopped bananas, cinnamon powder and coconut milk and blend till smooth. Mix in the nuts. Freeze the mixture for 6 to 8 hours in a container. Just before serving top it up with some roasted nuts.

Strawberry-Raspberry Dreams

1 cup Strawberries
½ cup Raspberries
3/4th cup unsweetened Coconut Milk
Maple syrup for sweetening

Freeze the strawberries and raspberries in freezer bag for 5 hours. For making the ice cream, in a blender add the frozen berries, coconut milk and maple syrup (some berries can be less sweet) as per your sweet preference and blend until smooth. Freeze the mixture for 6 to 8 hours in a container. Just before serving garnish it with some fresh berries.

Mango-Almond Joy

2 cups chopped sweet ripe Mangoes
½ cup unsweetened Coconut Milk
2 tablespoon roasted chopped Almonds
½ teaspoon Cardamom powder

Freeze the chopped mangoes in a freezer bag for 5 hours. For making the ice cream, blend the chopped magoes, coconut milk, cardamom powder until smooth. Mix in the chopped roasted almond. Just before serving garnish with fresh mango and chopped nuts.

Very-Berry Protein Cups

1 cup Blackberries
1 cup Blueberries
½ cup unsweetened Soy/ Almond Milk
1 scoop Nutrilie All Plant Protein Powder (flavorless) – optional
Maple Syrup for sweetening

Freeze the blackberries and blueberries (I hand picked these berries from a local farm) in freezer bag for 5 hours. For making the ice cream, in a blender add the frozen berries, soy milk, Nutrilte All Plant Protein Powder and maple syrup (some berries can be less sweet) as per your sweet preference and blend until smooth. Freeze the mixture for 6 to 8 hours in a container. Just before serving garnish it with some fresh berries.

Vegan Friendly Ice Cream DSC08354

Vegan Friendly Ice Cream

Note:

  1. If the mixture gets too thick then a tablespoon or more of the liquid base can be added.
  2. If needed the liquid base can be altered as per your preference with Almond, Soy, Coconut Milk. Personally, I feel the coconut milk give the ice cream a creamier texture.
  3. Choices of fruits totally depends on personal preferences.
  4. Sugar can be substituted instead of maple syrup.
  5. If needed, cacao powder can be added to give the ice cream a chocolaty taste.
  6. One 12.5 g serving of NUTRILITE All-Plant Protein Powder provides 10 grams of heart healthy protein. It’s 100% vegetarian, dairy free and thus is vegan friendly. It has low fat ( The highlight of this product is its’ flavorless and can be a healthy addition to any type of sweet or savory culinary preparation: omelets, crèches, home baked bagels, corn breads, muffins, stews, soup, healthy juices, shakes and smoothies. If you would like to give this amazing product a try click on the photo below.

Nutrilite Protein Powder2

Vegetarian Thai Coconut Peanut Curry (my version)

Vegetarian Thai Coconut Peanut Curry is my twisted version of the authentic Thai coconut curry; with minimum ingredients that can be found in any kitchen. This curry can be made in minutes. This curry is packed with vegetables, tofu and homemade curry paste made with coconut milk, peanuts and red chillies and flavored with basil leaves gown in my very own garden and some sauces. The choice of vegetables depends on your preference and taste. I made this curry with left over veggies I had in my kitchen but you can try it out with veggies like bamboo shoots, mushrooms, snow peas and the list is endless. So, try out this amazing curry (my version) with no compromise on taste and happiness !!

Veggie Thai Coconut peanut Curry

Ingredients: Serves 2
Mixed veggies – 2 cup (broccoli, green bellpeppers, bok choy, carrots, french beans)
Silken extra firm Tofu – 10 to 12 pieces
Basil leaves – 4 to 5
Ginger julienne – 1 tablespoon (1 inch piece ginger)
Garlic chopped – 1 teaspoon
Unsweetened Coconut milk – ¼ cup
Red chillies – 5 to 6
Roasted peanuts – 3 tablespoon
Liquid Aminos / soy sauce – 1 teaspoon
Lemon Juice / Apple Cider Vinegar (ACV) /Vinegar – 1 teaspoon
Salt and Pepper as per taste
Coconut Oil – 1 tablespoon
Water as needed

Method:

Veggie Thai peanut Curry Veggie Thai Peanut Curry

1. To make the Curry, first we have to make a paste of the coconut milk, red chillies and peanuts by grinding it in a blender.

Veggie Thai Peanut Curry

2. In a deep bottom pan, on high heat toast the tofu with some salt and pepper till lightly brown from outside but still soft from inside.
3. Now, in a deep bottom kadai / pan heat some coconut oil; add in the ginger julienne, chopped garlic and stir for 1 minute so that the flavors of ginger and garlic get infused into the oil.

Veggie Thai Coconut Peanut Curry

4. Add in the vegetables except the bok choy and basil leaves. Stir fry on high for 2 to 3 minutes, so that the veggies get cooked but still retain their crunchy texture.
5. Now, add in the prepared coconut paste, liquid aminos, Apple cider vinegar, salt and some water to adjust the consistency of the curry.

Veggie Thai Coconut Peanut Curry

6. When the curry comes to a boil, add in the tofu pieces, chopped bok choy along with the stems and basil leaves and switch off the heat and cover the pan with the lid.

Veggie Thai Coconut Peanut Curry

7. Just before serving garnish with some basil leaves, roasted peanuts and serve hot with brown rice or jasmine rice. I like it best with Quinoa. Enjoy !!

Note:
1. Any other variety of veggies / sprouts can also be added (except water content veggies)
2. I have prepared it completely in vegetarian style but you can add in some boiled chicken pieces too.
3. Liquid aminos is a great alternative to regular soy sauce. Since they are made with naturally occurring sodium from soybeans.

Plantain Stem Stir Fry (Vazhaithandu Poriyal)

This is my mom’s recipe. Its been 5 years since I have moved to the US. In these 5 years, I finally spotted this Plantain stem (Vazhaithandu) in an Indian Grocery store. I was so excited to see this amazing vegetable, which instantly made me nostalgic, as it reminded me of my mother making this amazing curry during my childhood, that I have missed for so long. I thought I should give this a shot. I immediately called her, noted the recipe and here it is, I share with you all, one of my mom’s best recipes in my own kitchen.
Here are a few benefits of Plantain stem for all those who may not be aware:
It helps to prevent constipation, heal stomach cramps and good for kidney stones. It reduces acidity and aids weight loss. It helps fight diabetes, Urinary tract infection (UTI) and stomach ulcers. It is rich in fiber, potassium and various other nutrients.

Try out this recipe and get benefited from this amazing gift of Mother nature.

Plantain Stem Stir Fry

Ingredients : Serves 2 to 3
Plantain stem – 1 medium length
Grated coconut – 2 tablespoon
Curd – 2 tablespoon
Yellow Moong dal – 2 tablespoon
Salt – As needed
Curry leaves – 5 to 6
Mustard seeds – 1 teaspoon
Urad dal – 1 teaspoon
Asafoetida / Hing – less than 1/8th teaspoon
Green Chilli – 2 to 3
Coconut oil / any oil – 2 tablespoon

Method:
1. To make the Plantain stem curry, in a big bowl add 2 cups of water, some salt and 2 tablespoon curd and keep aside.

Plantain stem

2. Soak the yellow moong dal in 1 cup water and keep aside.

Plantain Stem Plantain stem plantain stem Plantain stem

3. Now, remove the outer ring of the stem as shown in the picture; so that there are no more rings left to be removed.

Plantain stem

4. Then slice thinly into discs. Remove the fiber from the sliced disc by rotating your finger over the slice in a circular motion. Do same for all the remaining slices. At first it is little difficult to remove the fiber, but trust me in a matter of minutes the job is done. Usually, the tender stems do not have much fiber.

Plantain stem

5. Cut the slices into small pieces and immediately put them in the curd water mixture. The reason for doing this is to avoid the plantain stems to discolor. Soak for 10 minutes.
6. Drain the water completely from the plantain stem and moong dal. Do not throw the plantain stem water.

Plantain stem

7. In a kadai / deep bottom pan add coconut oil and when the oil is hot add the mustard seeds, urad dal and asafoetida /hing. When the mustard seeds crackle, add the curry leaves and green chillies.

Plantain stem DSC08149

8. Now, add the moong dal and chopped plantain stem to the kadai. Add little salt (remember we had soaked the plantain stem in curd and salt water) You can sprinkle the reserved water for cooking the stem if needed. Cook for 8 to 10 minutes.

plantain stem

9. You will notice that it has become transparent after it gets cooked and can be smashed easily.

Plantain stem

10. Lastly add the grated coconut. Mix well and put off the flame.

Plantain Stem Stir Fry

11. Serve hot as a side dish to rice, more kuzhambu (buttermilk kadi), rasam or just by itself. Enjoy!!!!

Note:
How to select the right plantain stem: Ensure that the plantain stem is firm and fresh. It usually is pinkish whitish to off white color. The thicker the outer stem, the tender it will be inside.

Source: http://www.boldsky.com/health/wellness/2015/health-benefits-of-plantain-stem-juice-068049.html

Savory Protein Pancakes (Vegan & Gluten-Free)

My husband loves warm and sweet homemade brunches like muffins or pancakes during the weekend. Last Sunday, for a change, I decided to make a savory protein vegan pancake. Yes, pancake and vegan, it can be done!! By the way, we are not vegans; it was just that I was out of eggs and dairy that day and we wanted to have savory pancakes, without having to go out to buy ingredients; so I came up with this recipe. These pancakes are super quick and easy to put together. They can make delicious and nourishing breakfast, brunch or even dinner. All you have to do is pour the pancake batter on the pan and top it up with some veggies and cook till done on both sides. Serve them hot with your favorite condiment/ chutney. And, guess what, they are super healthy too!!!

Savory Protein Pancakes

Ingredients: Makes 6 (medium size)
Finger Millet / Ragi Flour (gluten-free): 1 cup
Chickpea Flour  (gluten-free) – ¼ cup
1 scoop of NUTRILITE All-Plant protein powder (flavorless) – optional
Chopped vegetable (spinach, onion,tomatoes,  red bellpeppers) – 1 cup
Flax Seeds – 2 teaspoon (eggs substitute)
Salt to taste
Green chilles chopped – 2 small
Tumeric Powder – ¼ teaspoon
Garam Masala or Curry Powder – ½ teaspoon
Soy Milk to make the batter.
Nutritional Yeast (optional)

Method:
1. Soak the flaxseeds in 2 tablespoon hot water for 15 minutes.
2. After 15 minutes the flaxseeds will be like egg white / gooey consistency.

Flaxseeds Flaxseeds

3. Spray a nonstick fry pan with the Non- Stick cooking spray.
4. In a bowl mix the Finger Millet flour, Chickpea flour, Nutrilite All Plant protein powder, soaked flaxseeds along with the water, garam masala powder, turmeric, green chillies, salt along with soy milk to make a pancake consistency batter. Do a salt and spice taste test.

Savory Protein Pancakes Savory Protein Pancakes

Savory Protein Pancakes

5. Pour the batter on a nonstick fry pan,top it up with some  vegetables and cook till done on both sides.
6. Sprinkle some Nutritional Yeast if needed. Serve with your favorite condiment/ chutney.

Note:
1. Any other plant protein powder (flavorless) of your choice can be added too.
2. Low fat milk can be substituted in place of soy milk if not vegan.
3. Nutritional yeast is a substitute for the regular cheese.
4. One 12.5 g serving of NUTRILITE All-Plant Protein Powder provides 10 grams of heart healthy protein. It’s 100% vegetarian, dairy free and thus is vegan friendly. It has low fat ( The highlight of this product is its’ flavorless and can be a healthy addition to any type of sweet or savory culinary preparation: omelets, crèches, home baked bagels, corn breads, muffins, stews, soup, healthy juices, shakes and smoothies. If you would like to give this amazing product a try click on the photo below.
Nutrilite Protein Powder2

Source: http://www.nutrilite.com